Steps
Prerequisites:
Ensure you have a Liveblocks account and a Bubble account. The free accounts for both services are more than enough to get started.1. Create a new app
First, you’ll need to create a new app in Bubble. Sign into Bubble, head to the apps tab in your Bubble account, and click on the “Create new app” button. You won’t need a template.
 You can start with the basic features and skip the application assistant.
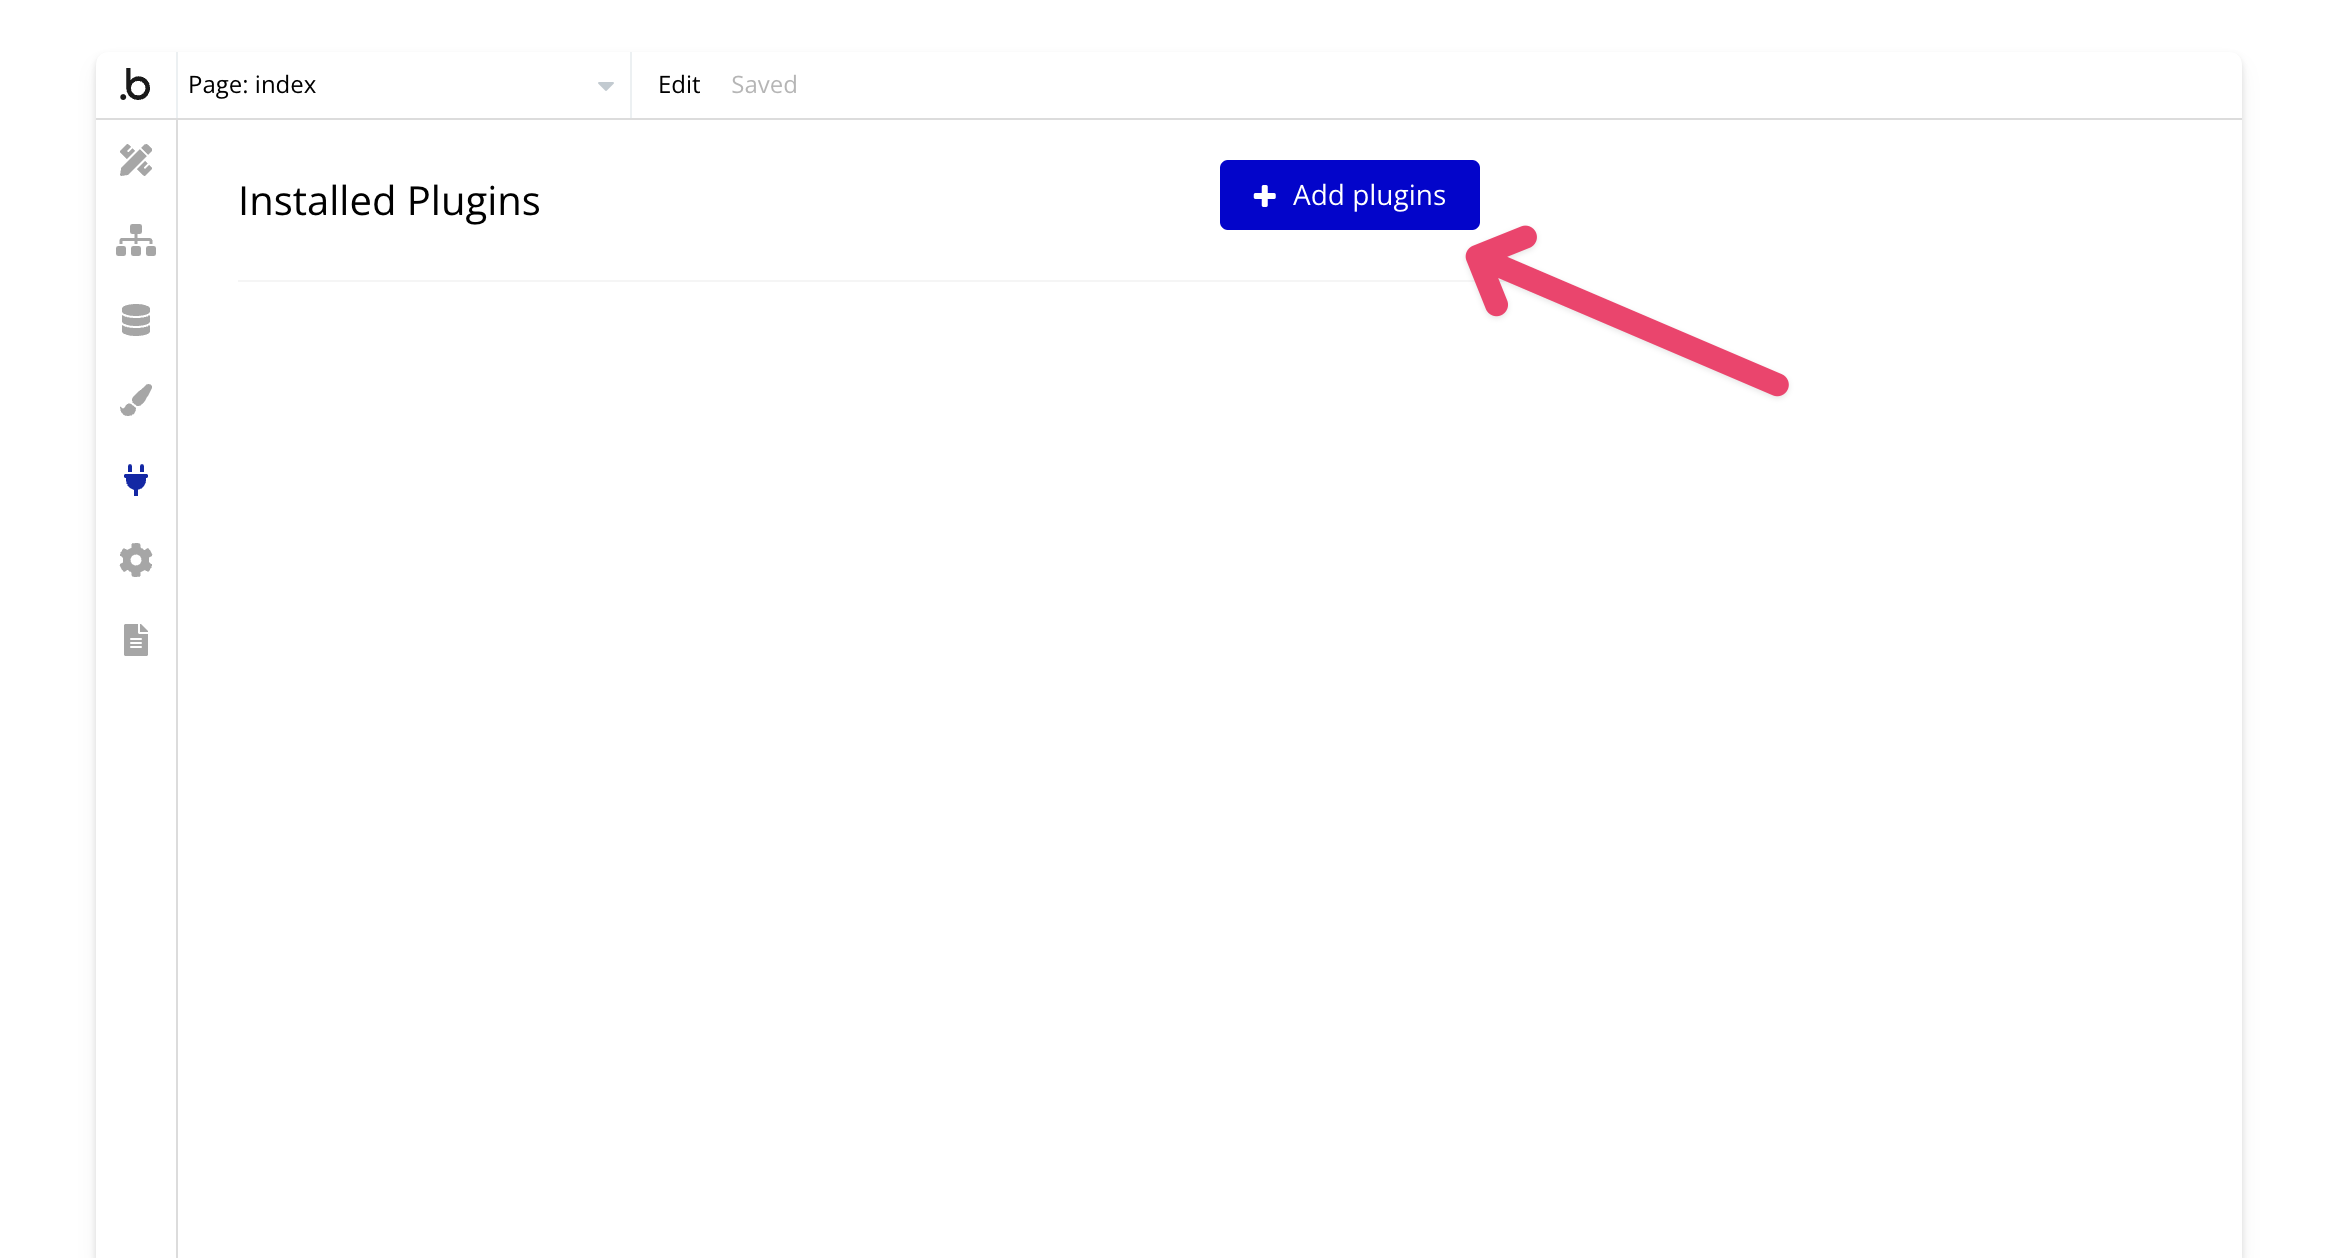
2. Head to the plugins tab
Now that you’re in the app editor, head to the plugins tab. Select “Add plugins.”
 Search for “Liveblocks by Lunch Pail Labs” and click install.

3. Create a Liveblocks project
Now you should see the Liveblocks plugin in the plugins tab.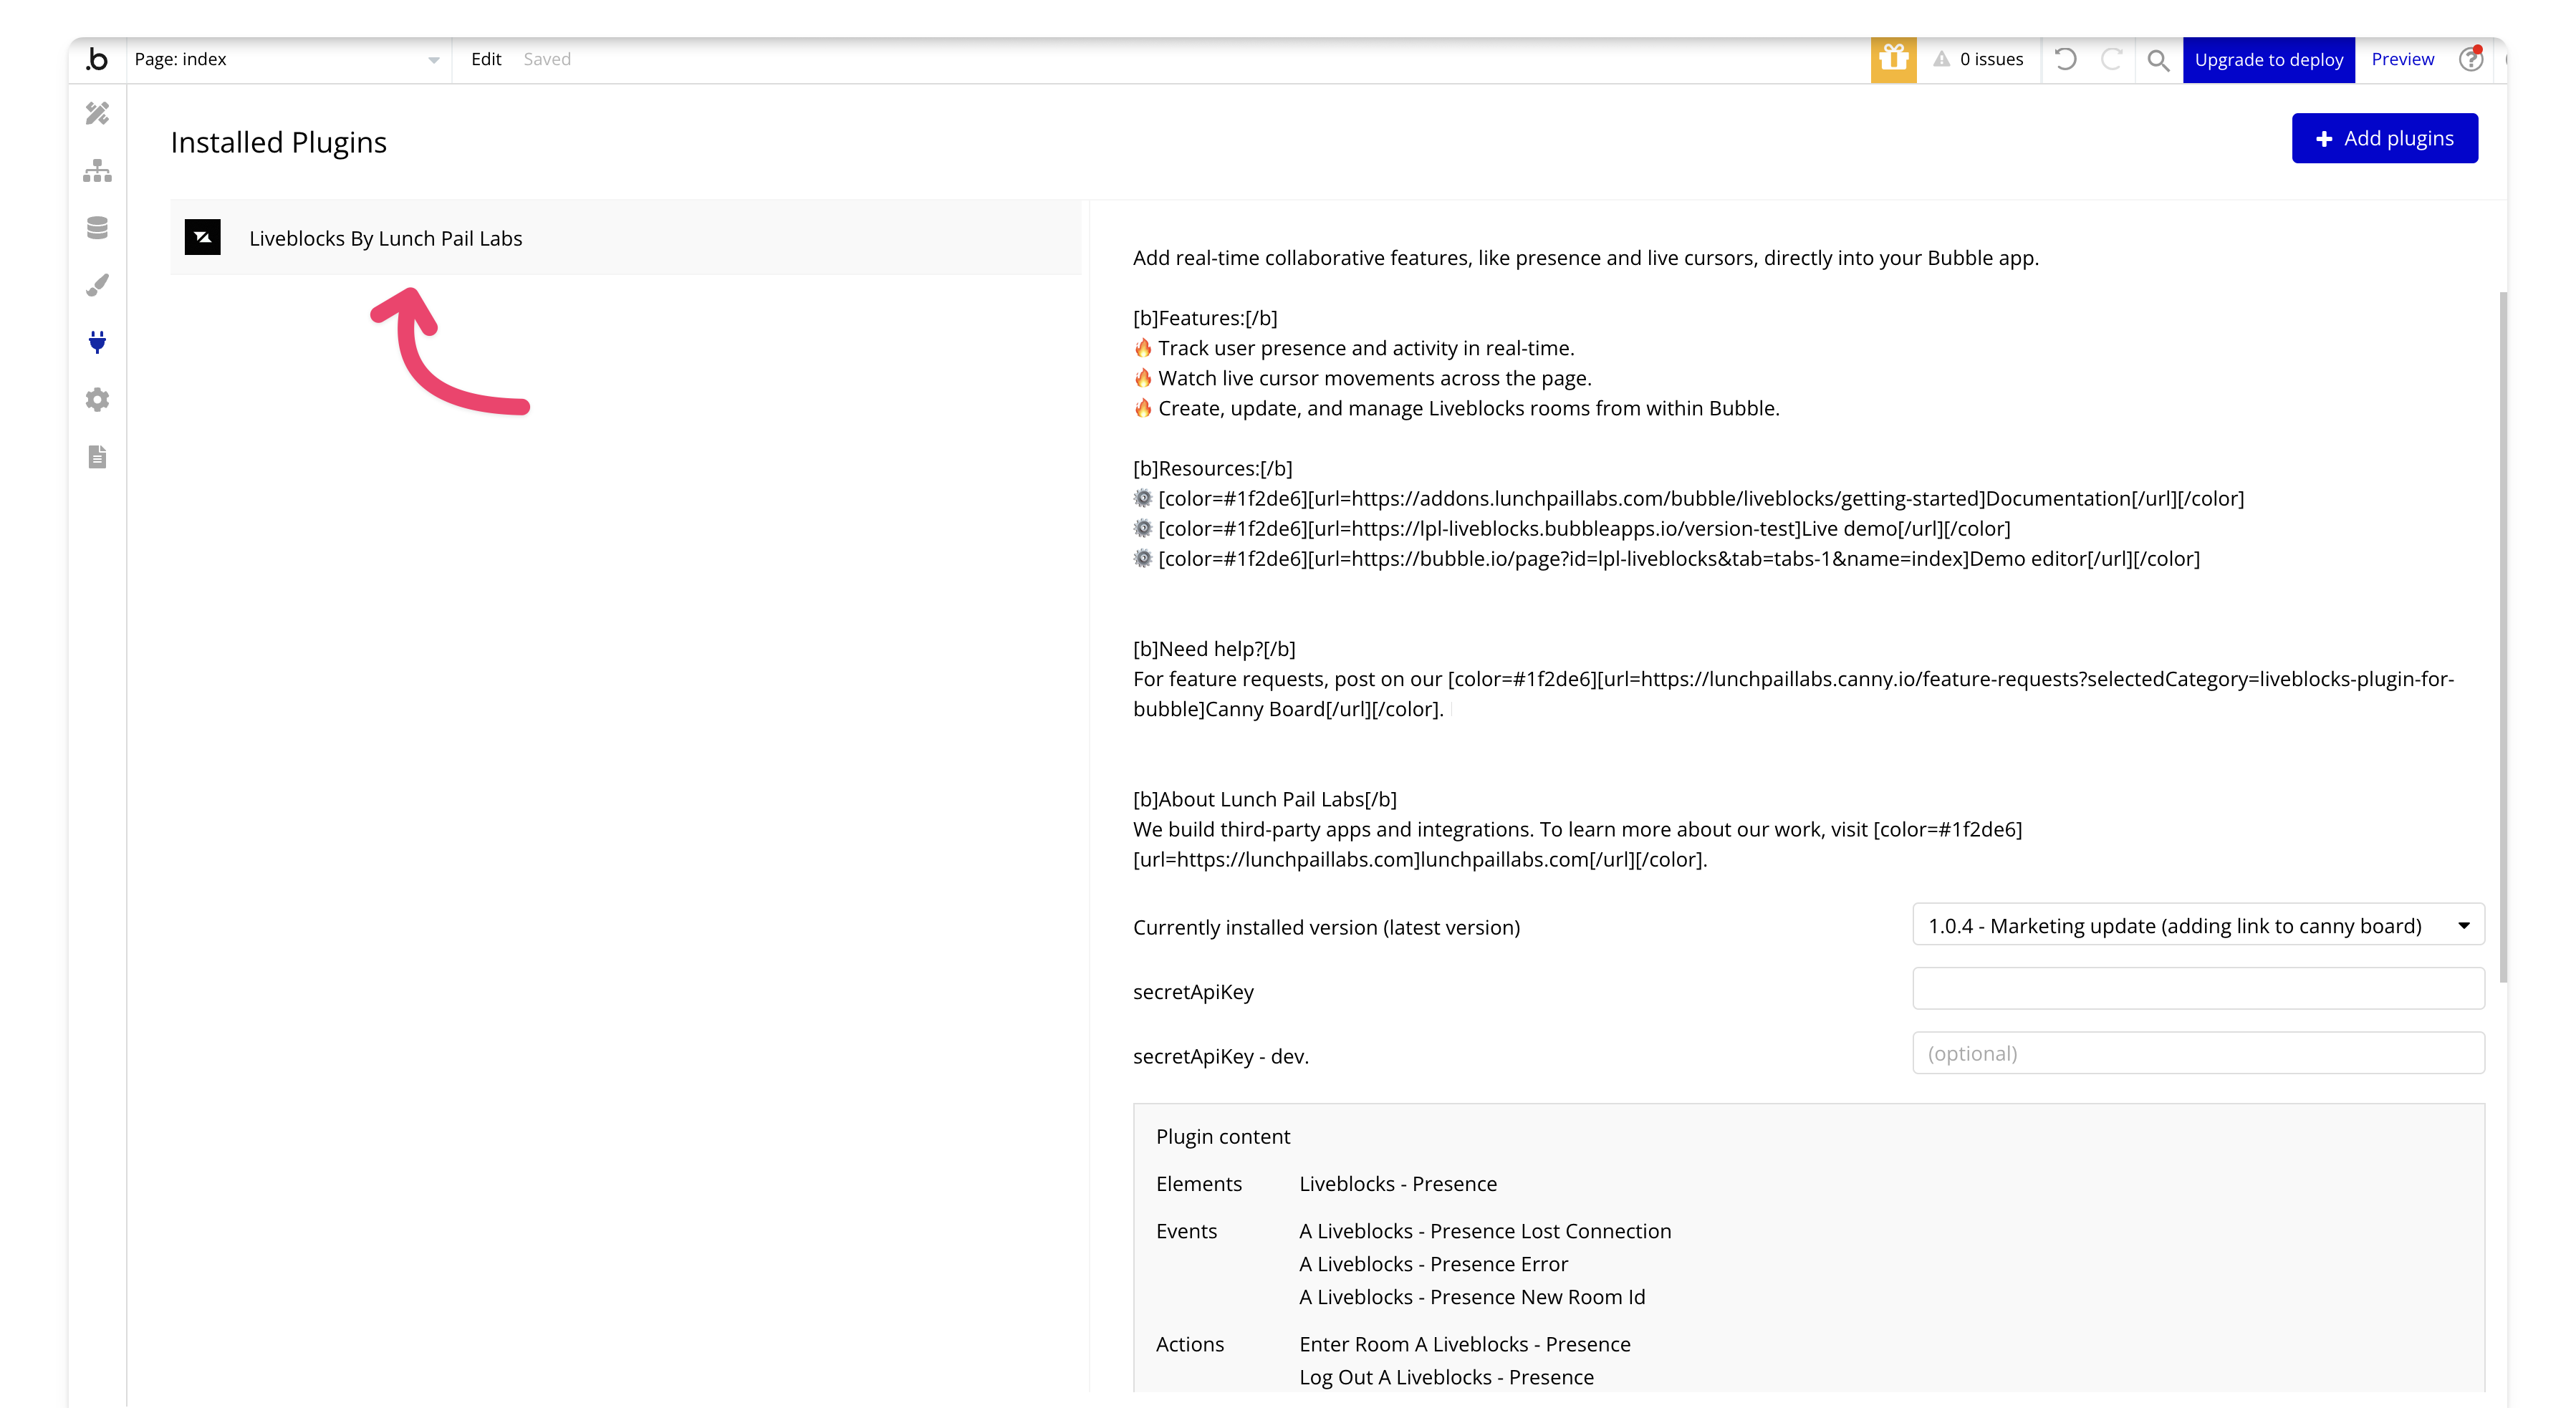 You’ll need to add your secret key to your app, so go to your Liveblocks dashboard.
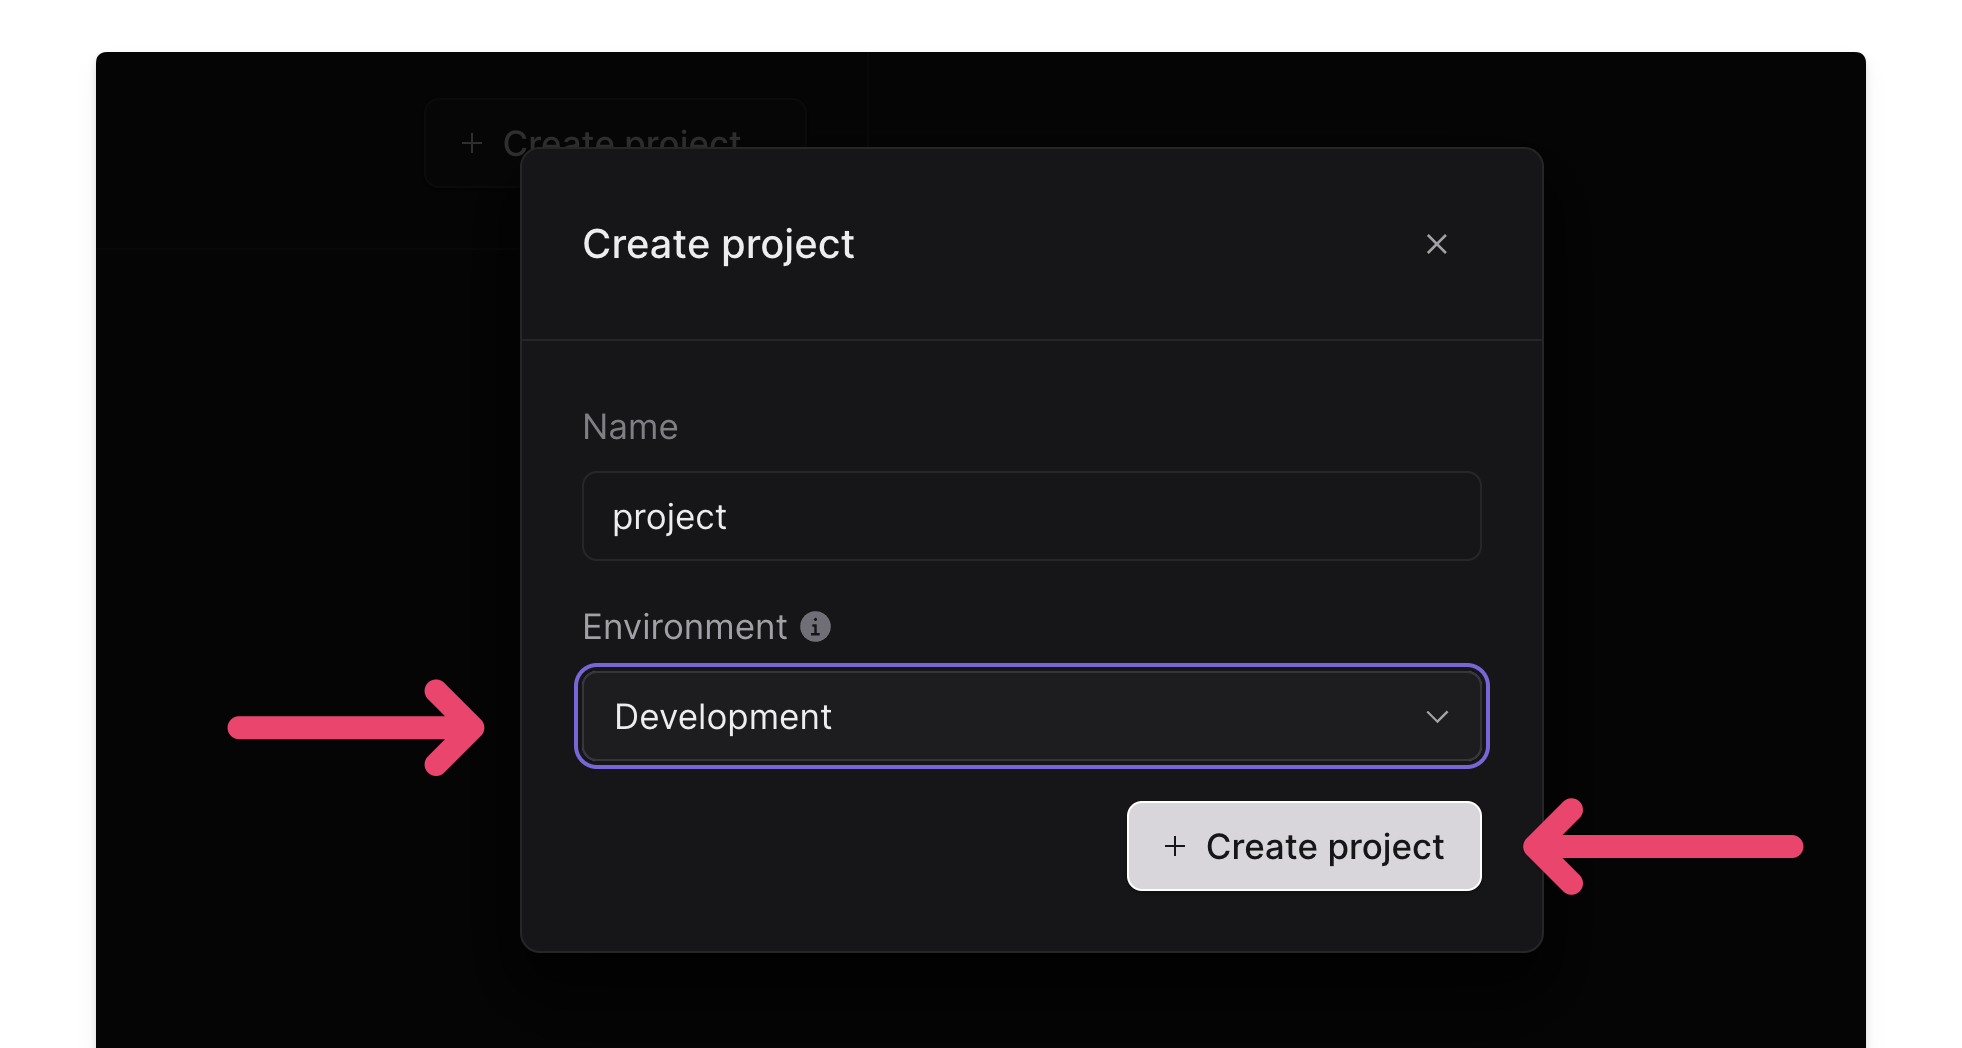
Add a project if you don’t already have one.
You’ll need to add your secret key to your app, so go to your Liveblocks dashboard.
Add a project if you don’t already have one.
 For this demo, we’ll set up a development project, but in a live production environment, you’ll want to create a production environment as well.
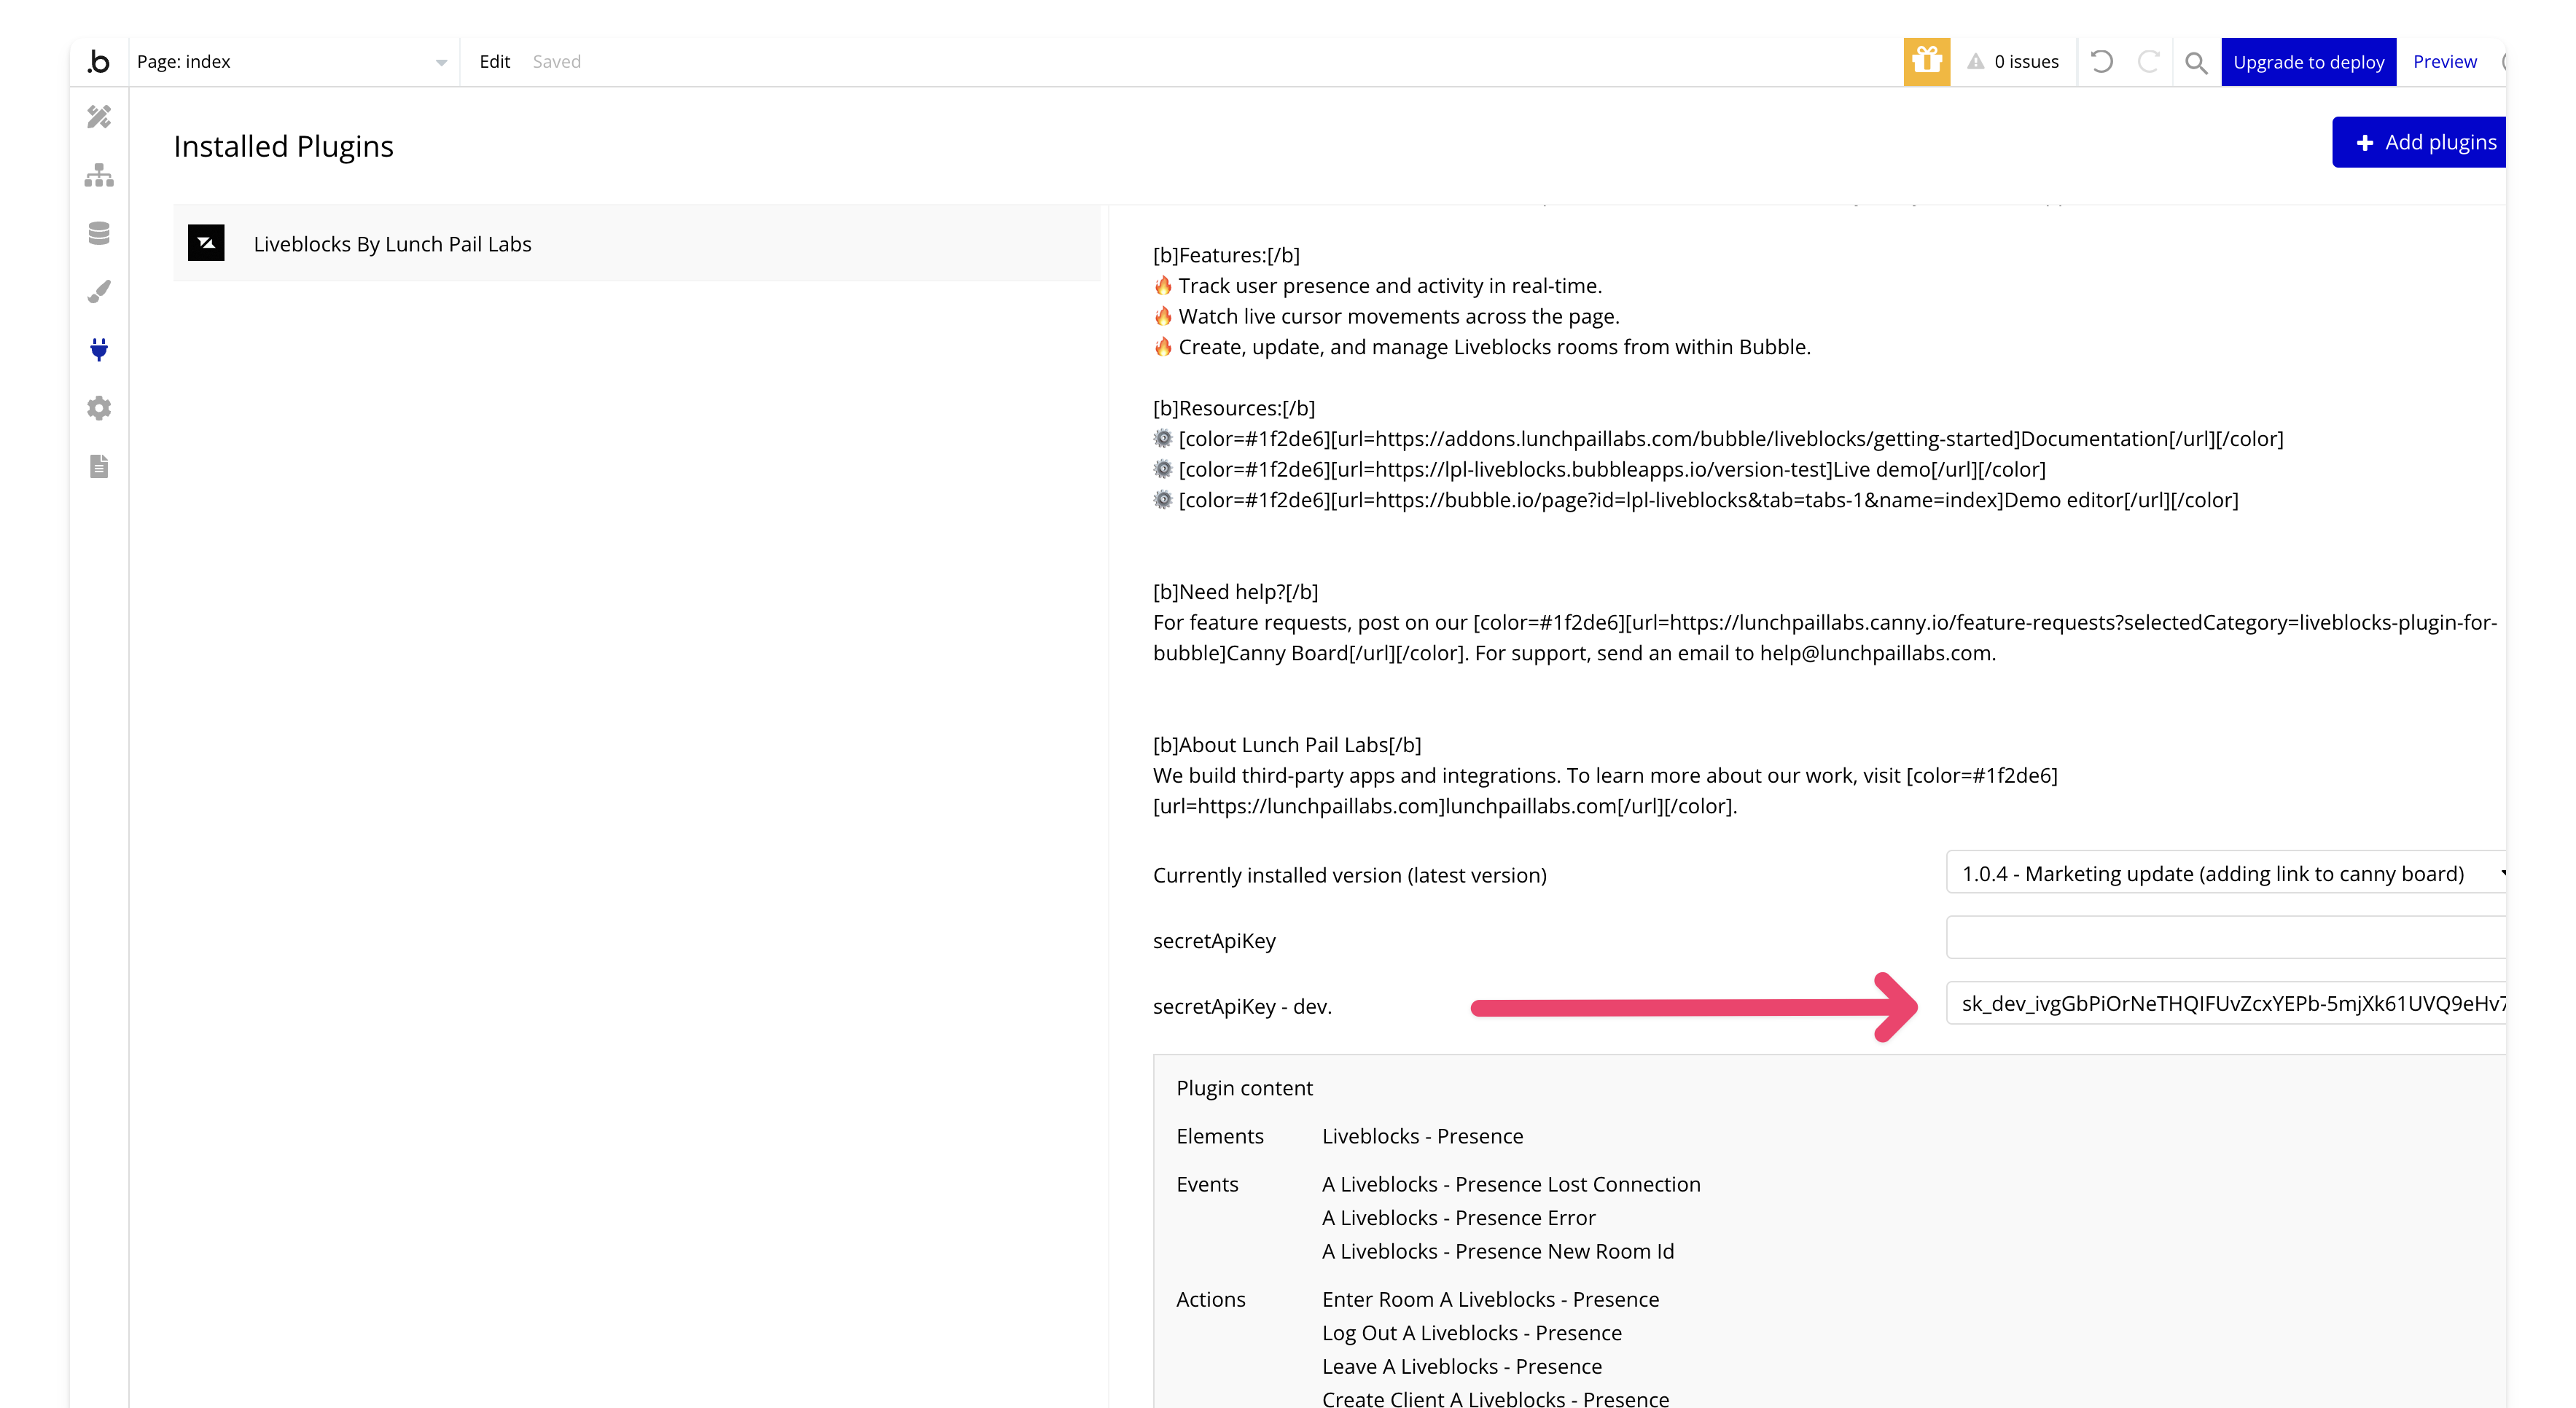
4. Add your secret key to the Liveblocks plugin
Go to the API Keys tab and reveal your key and copy it, Next, paste the key into the dev field of the Liveblocks plugin. When you move to production, be sure to create a production project and use the production key.
In the PLUS version of the plugin, make sure to add your key to the authorization field, and remember to prepend Bearer before your API key.
⚠️ Remember, keys are sensitive—keep them secure to avoid unauthorized access and potential charges on your account.
Next, paste the key into the dev field of the Liveblocks plugin. When you move to production, be sure to create a production project and use the production key.
In the PLUS version of the plugin, make sure to add your key to the authorization field, and remember to prepend Bearer before your API key.
⚠️ Remember, keys are sensitive—keep them secure to avoid unauthorized access and potential charges on your account.