🔐 Bundle plugin only: This is exclusive to the Video, Audio & Live
Bundle. Get the bundle
plugin
here.
Steps
1. Enable Backend Workflows
To receive webhooks in your app, go to the API tab in your app’s settings and check Enable Workflow API and backend workflows.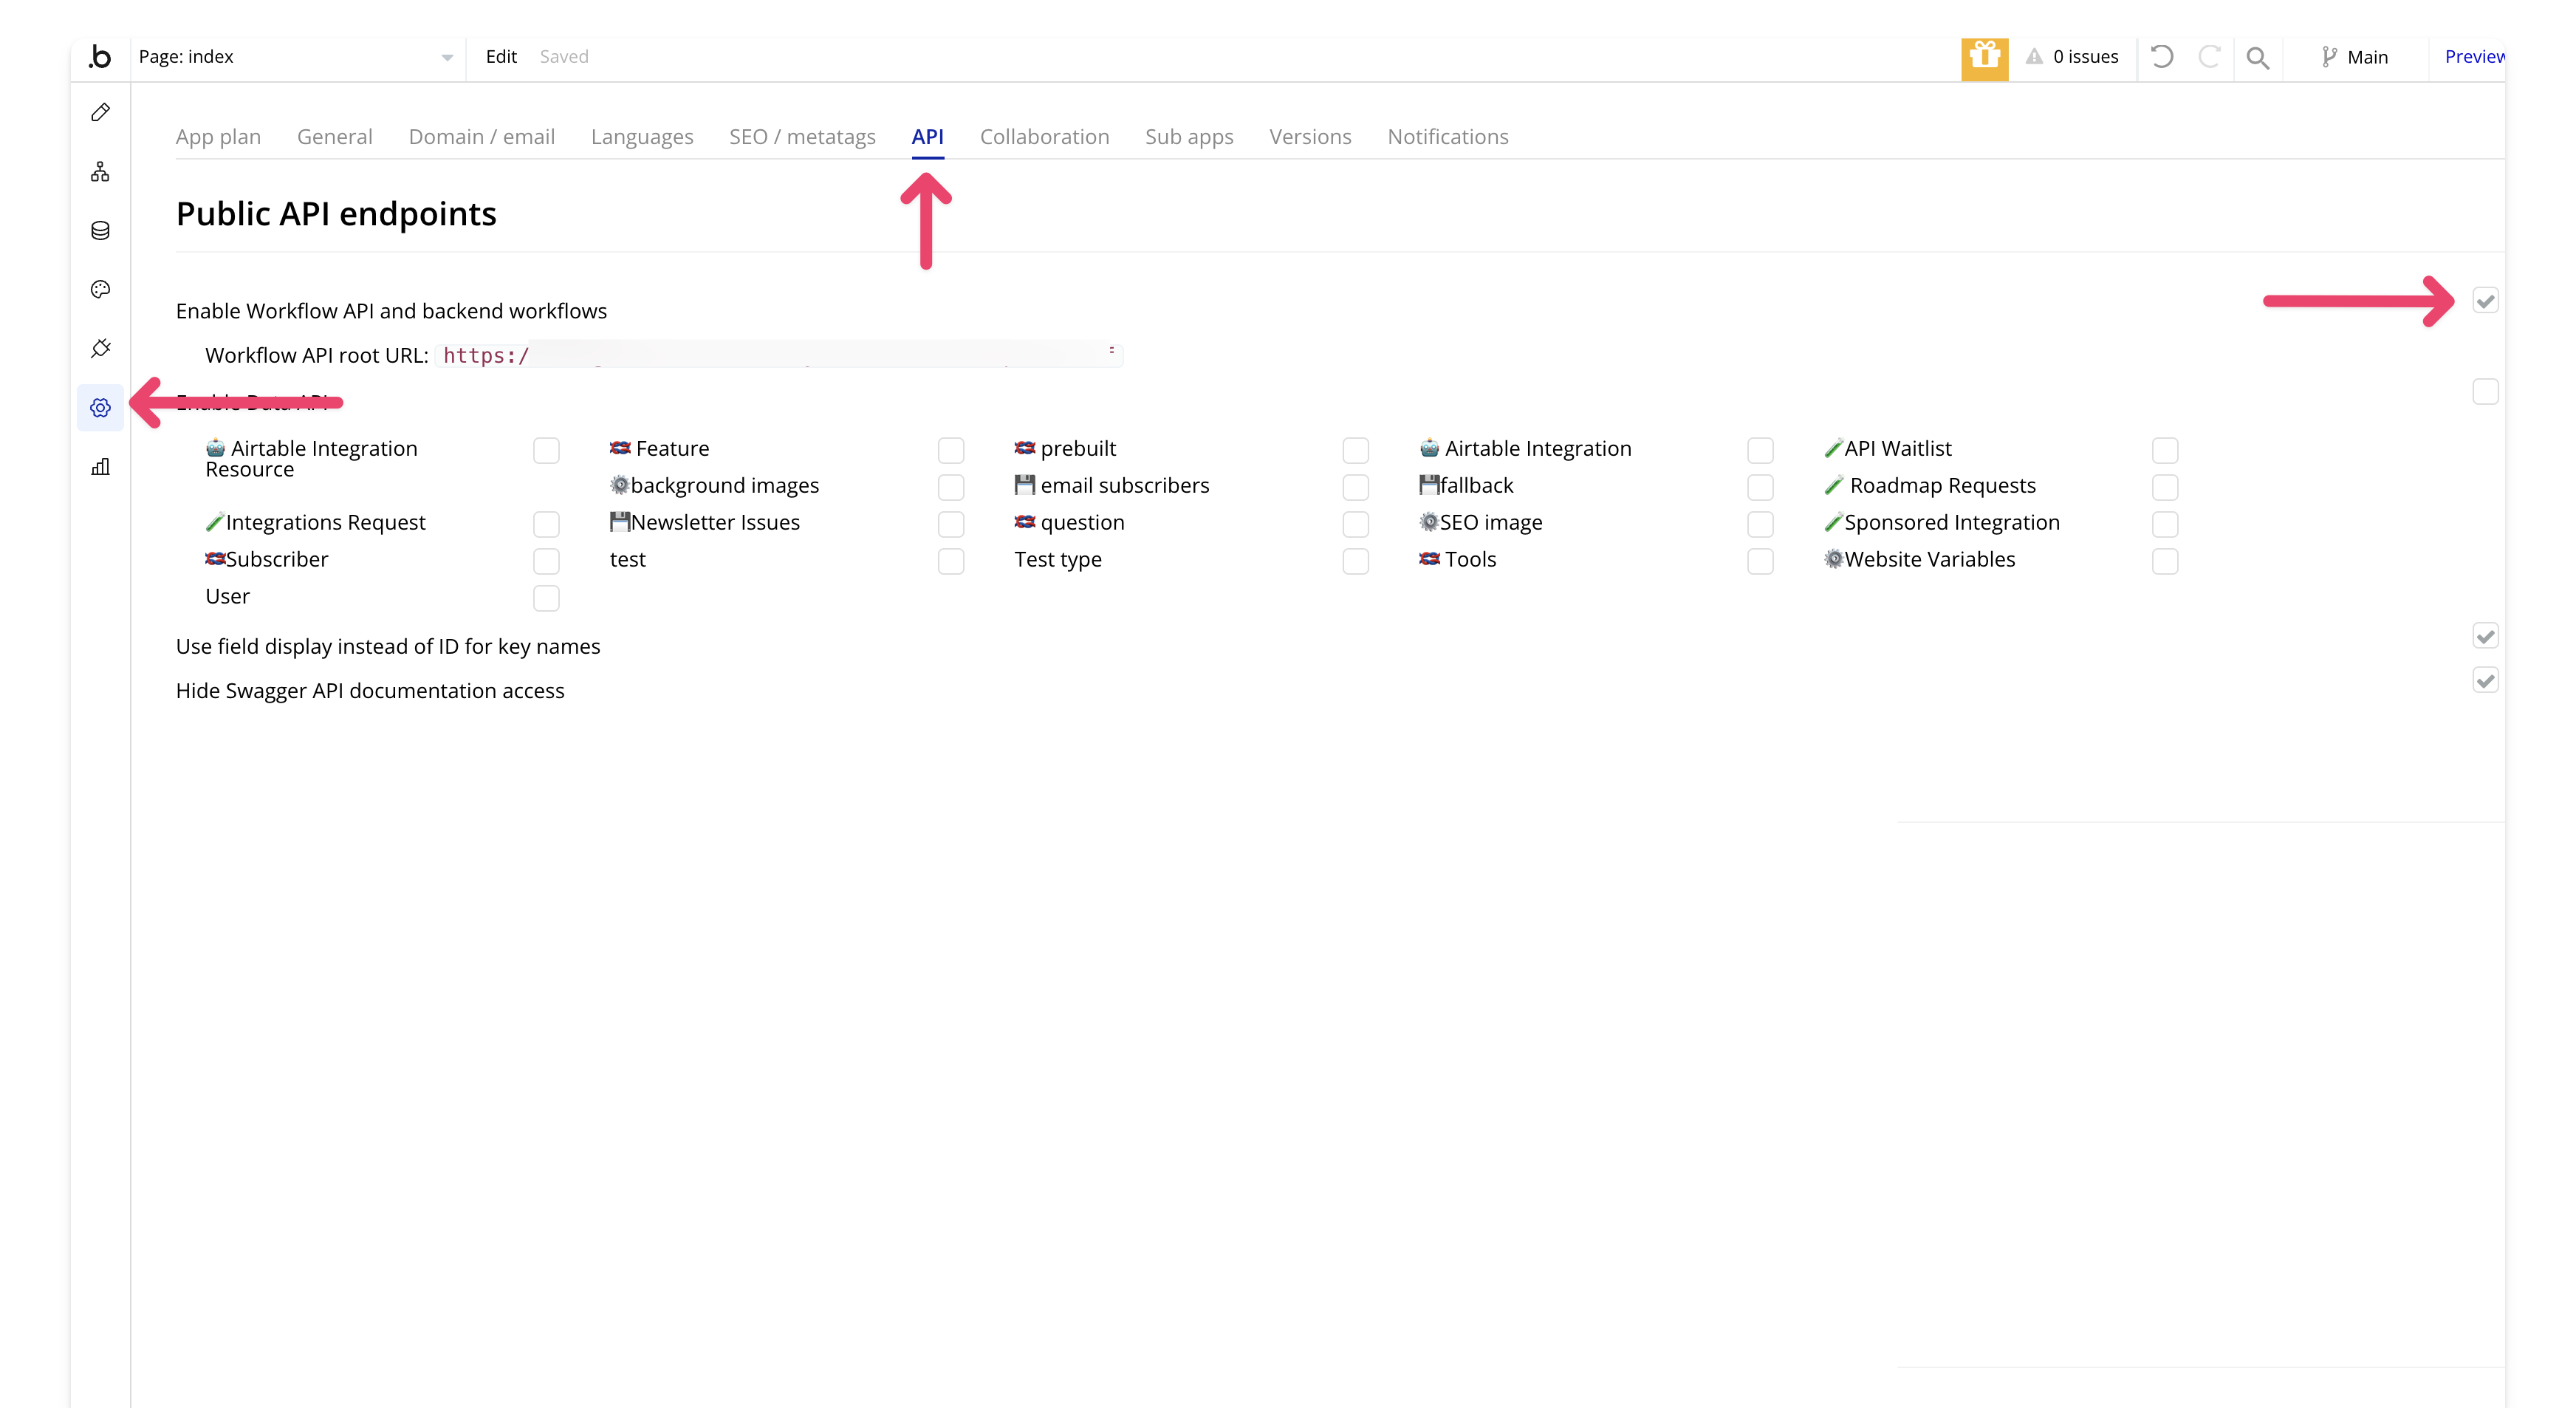 You should now see a new Backend Workflows section in your app.
2. Create a New API Workflow
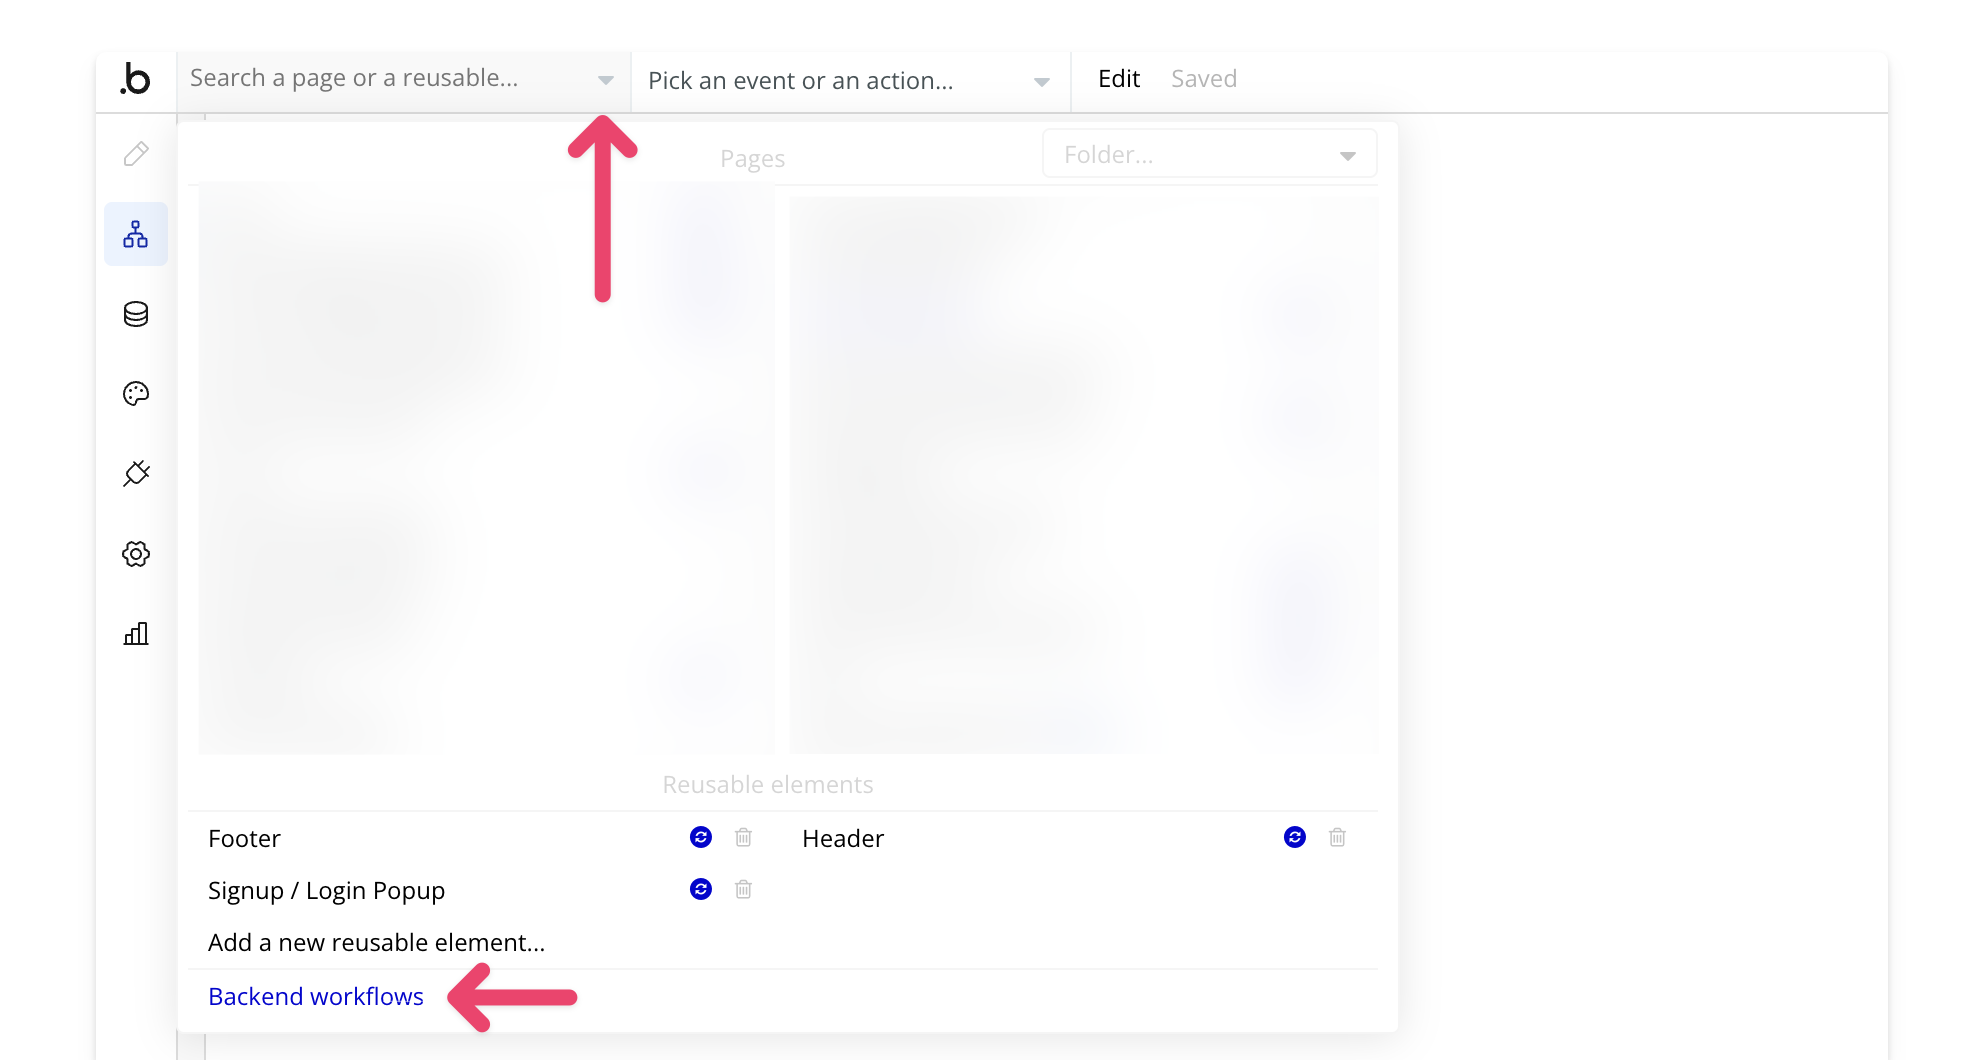
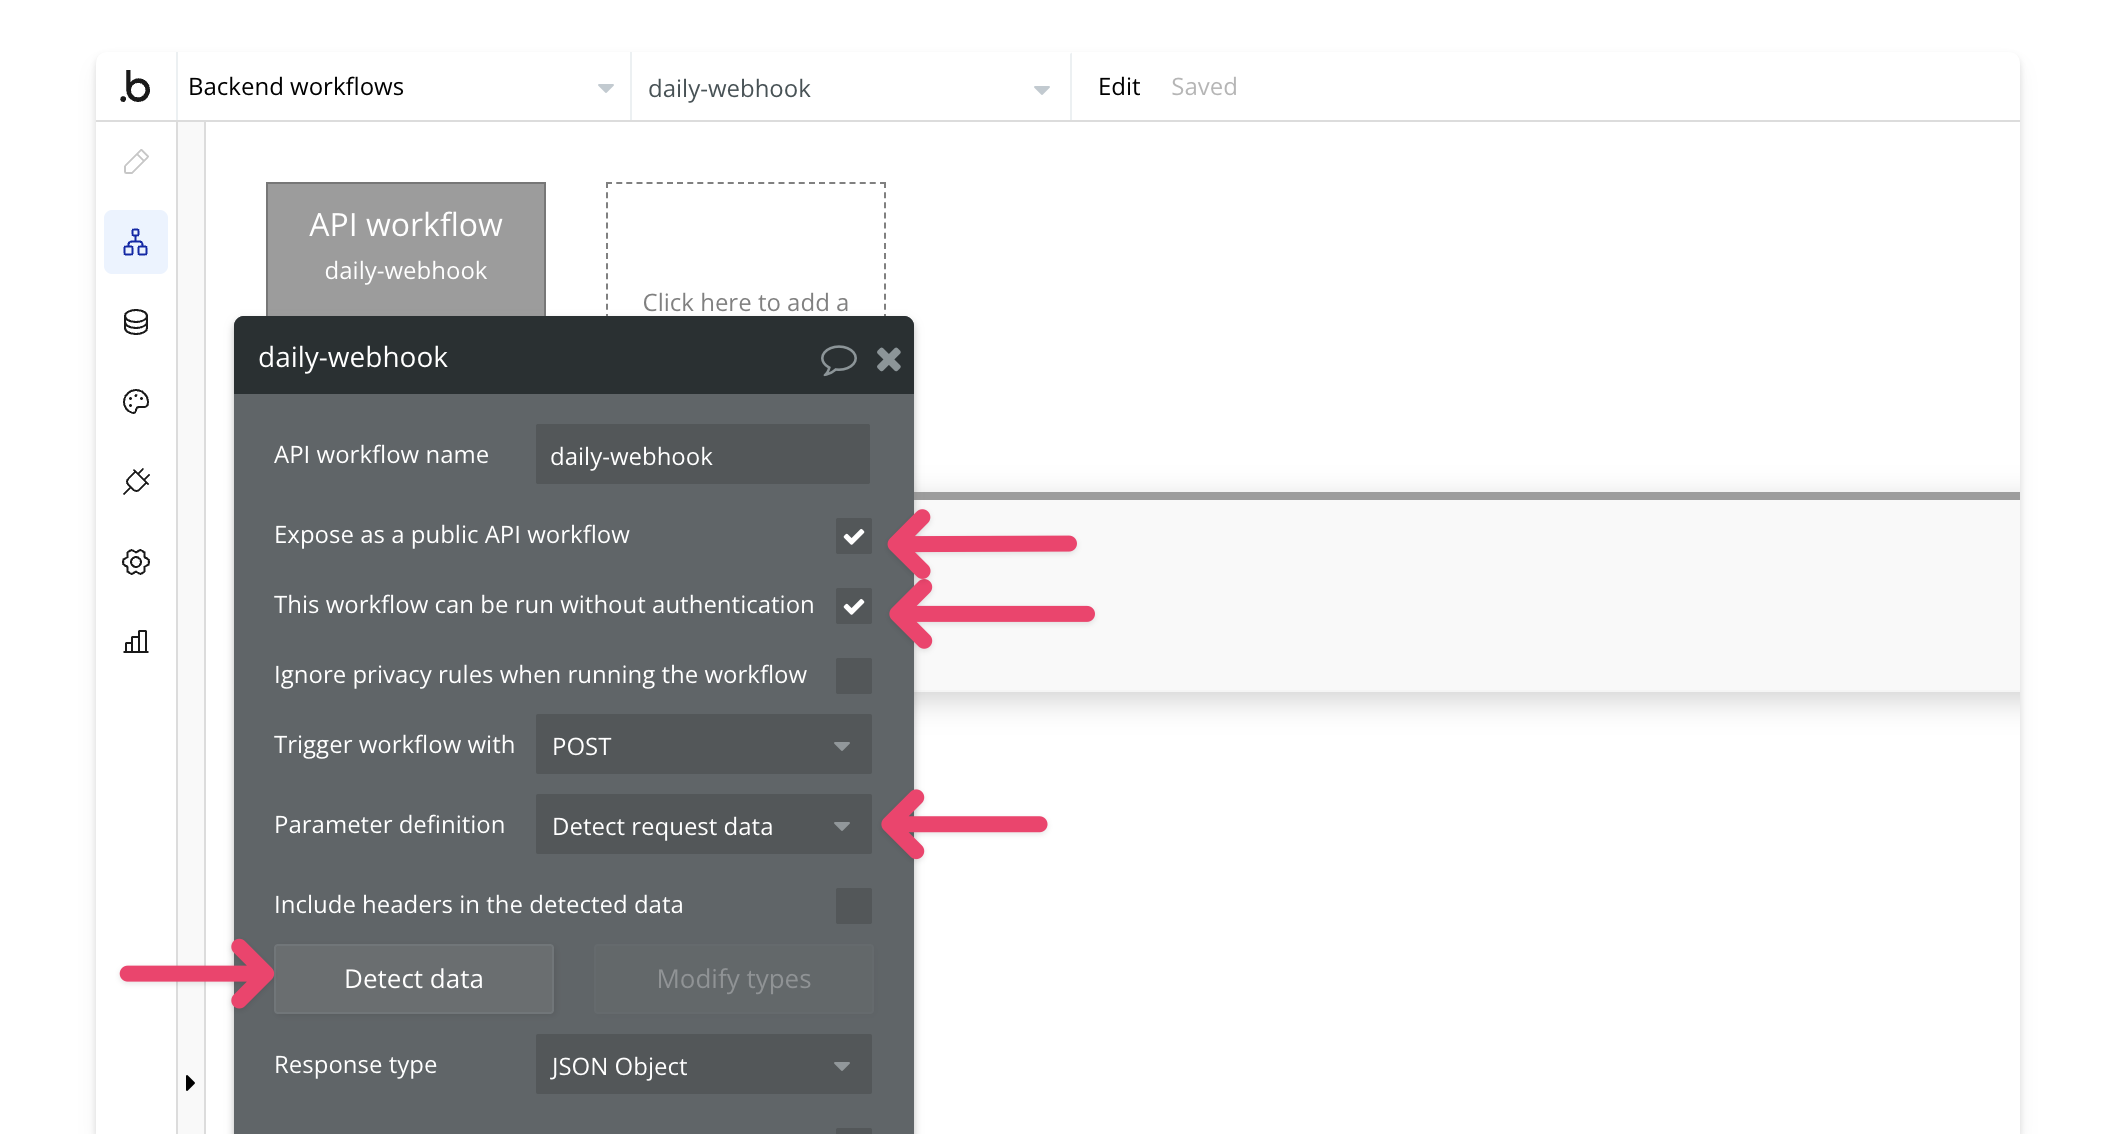
In Bubble, go to Backend Workflows and click “Click here to add a new backend workflow”. Select New API Workflow.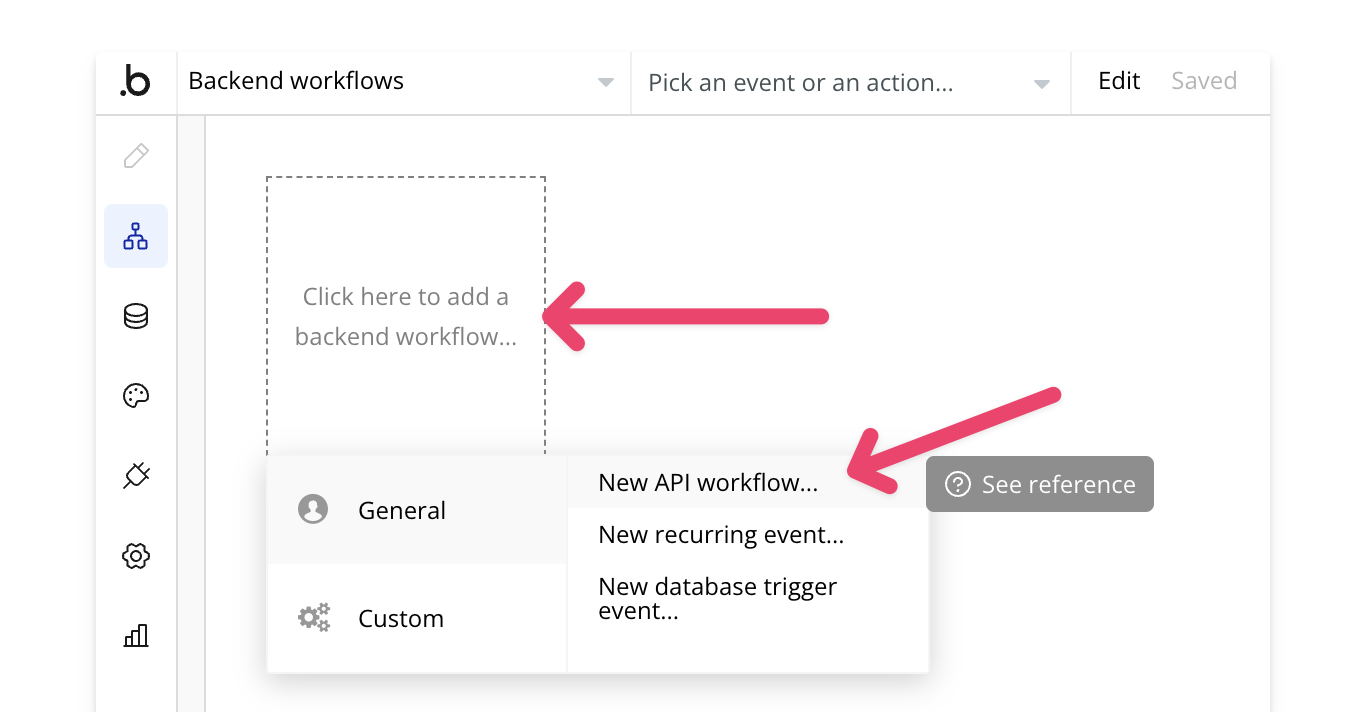 Give the workflow a name, check “This workflow can be run without authentication”, and set the parameter definition to Detect Request Data.
4. Detect Data
In Backend Workflows, select Detect Data. Open another tab with your Bubbles editor to create a workflow that initializes the webhook.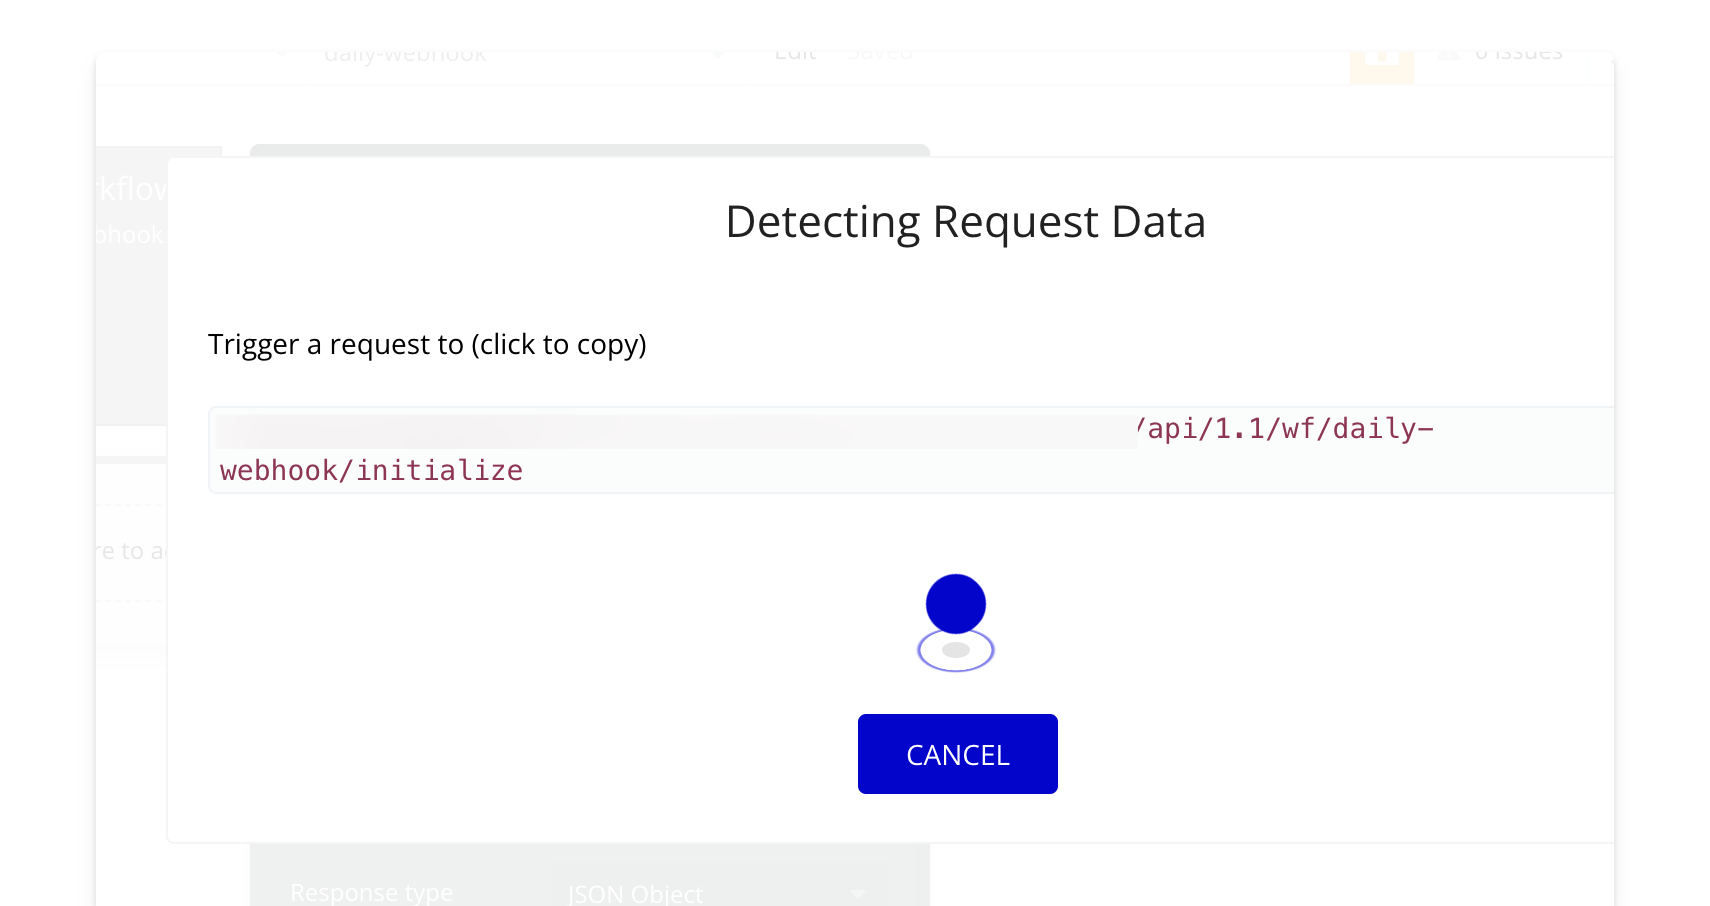
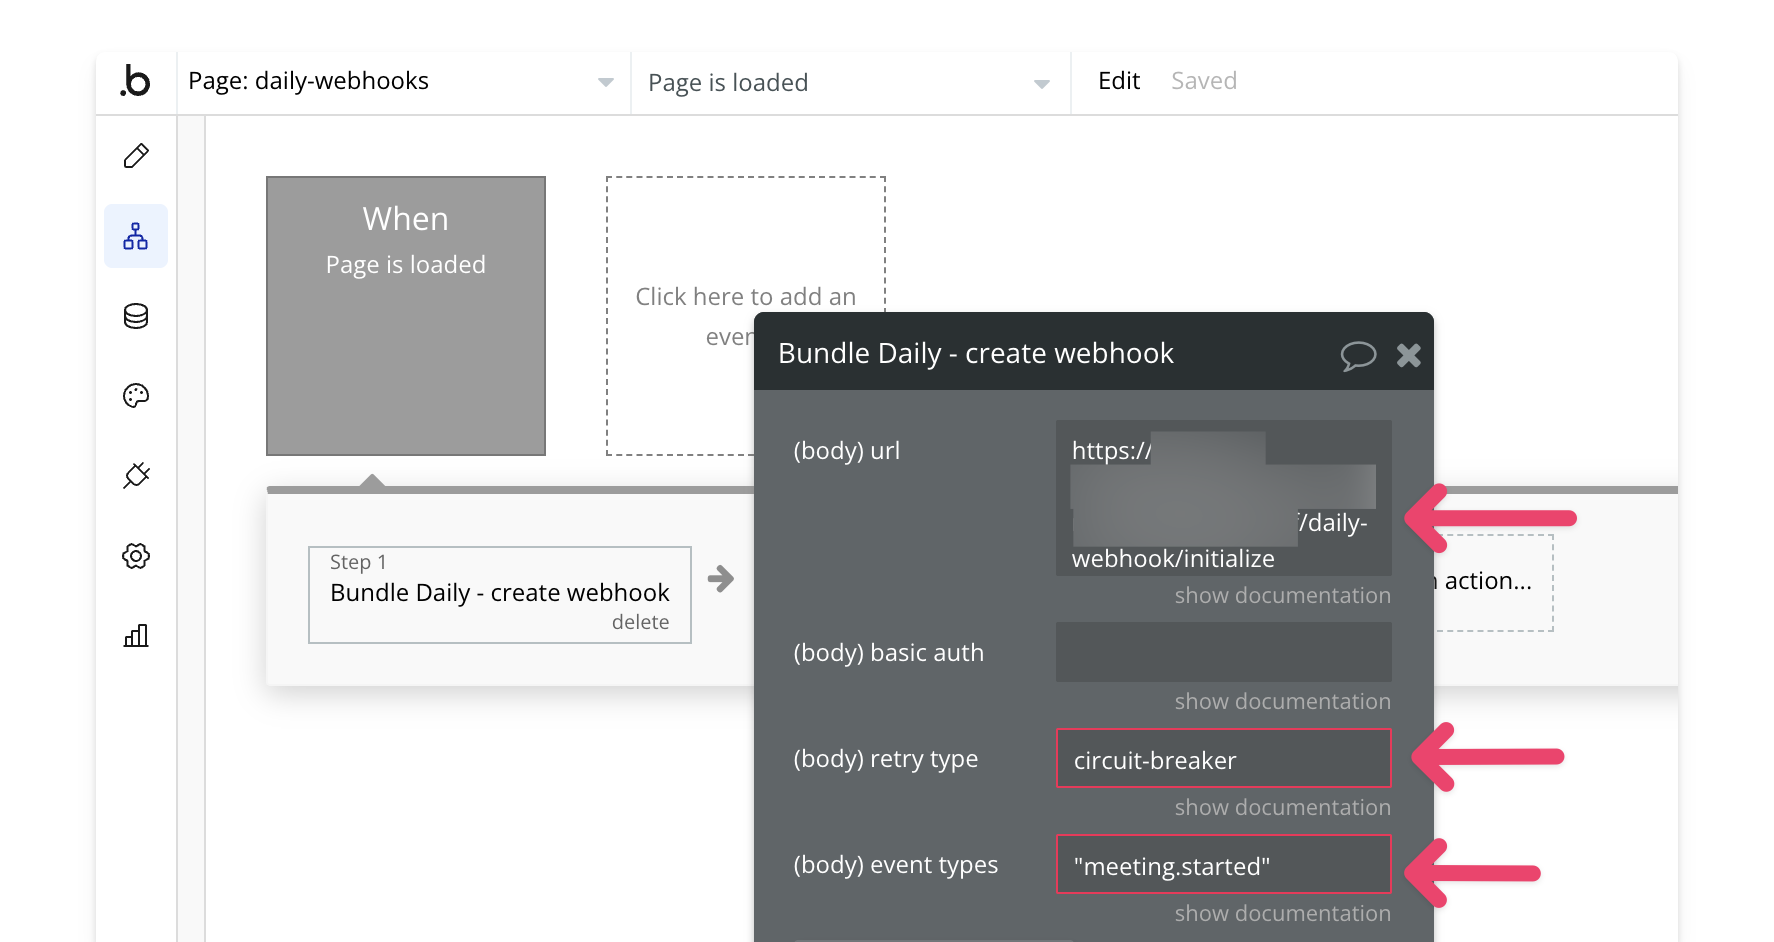
5. Create a Webhook
Use the Create Webhook action to set up a webhook. In this example, the webhook is initialized on page load, but you can trigger it from any workflow in your app. Note: Only one webhook is allowed per Daily domain. Add the initialized URL from the previous step, leave basic authentication blank, and set the retry type to Circuit Breaker. For event types, refer to Daily’s documentation and specify the events you want. To include multiple events, separate them with commas and wrap each in quotes. Example:"meeting.started", "recording.ready-to-download"
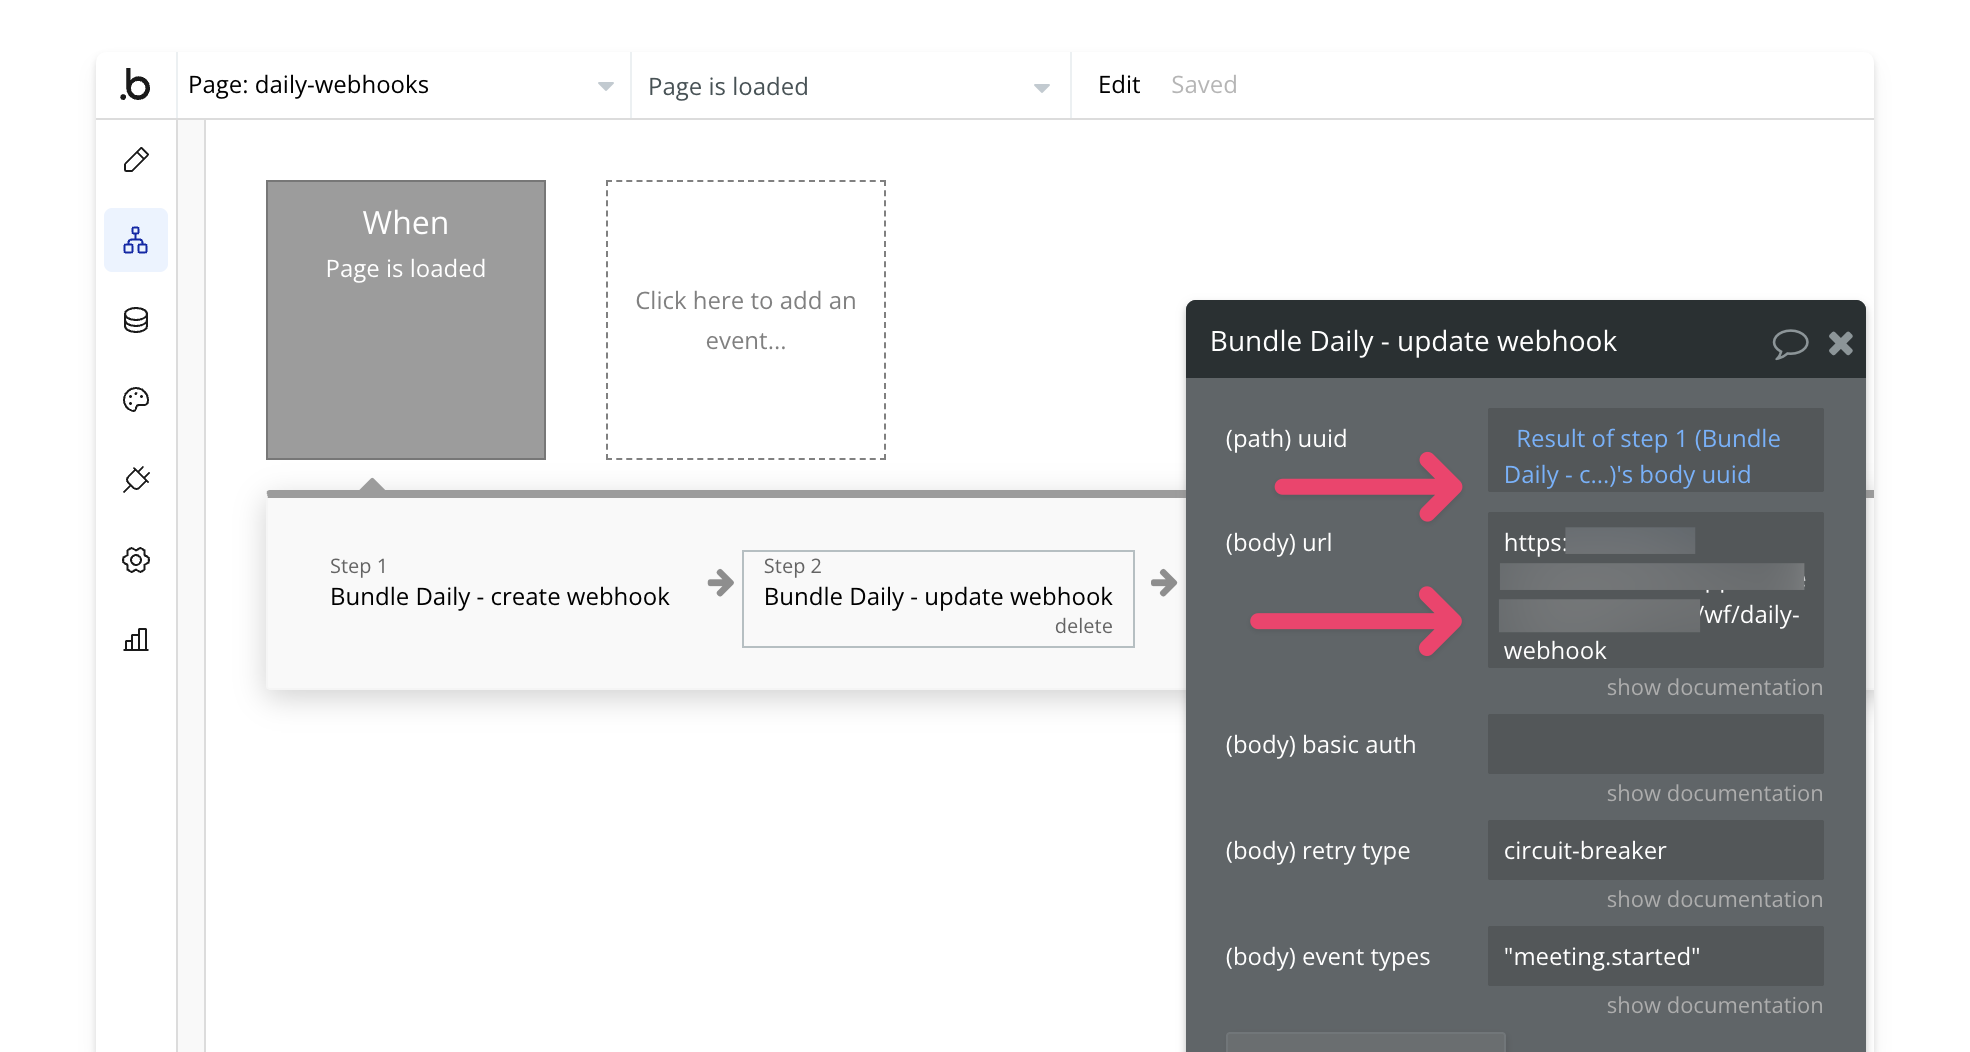
6. Update the Webhook
After initializing the webhook, update it with the actual domain using the Update Webhook action. The UUID will be the webhook created in the previous step. The other fields will remain the same as in the previous step, but the URL should be updated to remove the/initialize at the end.
7. Update the Response Format
In Backend Workflows, select Modify Types for the backend workflow you created in Step 2.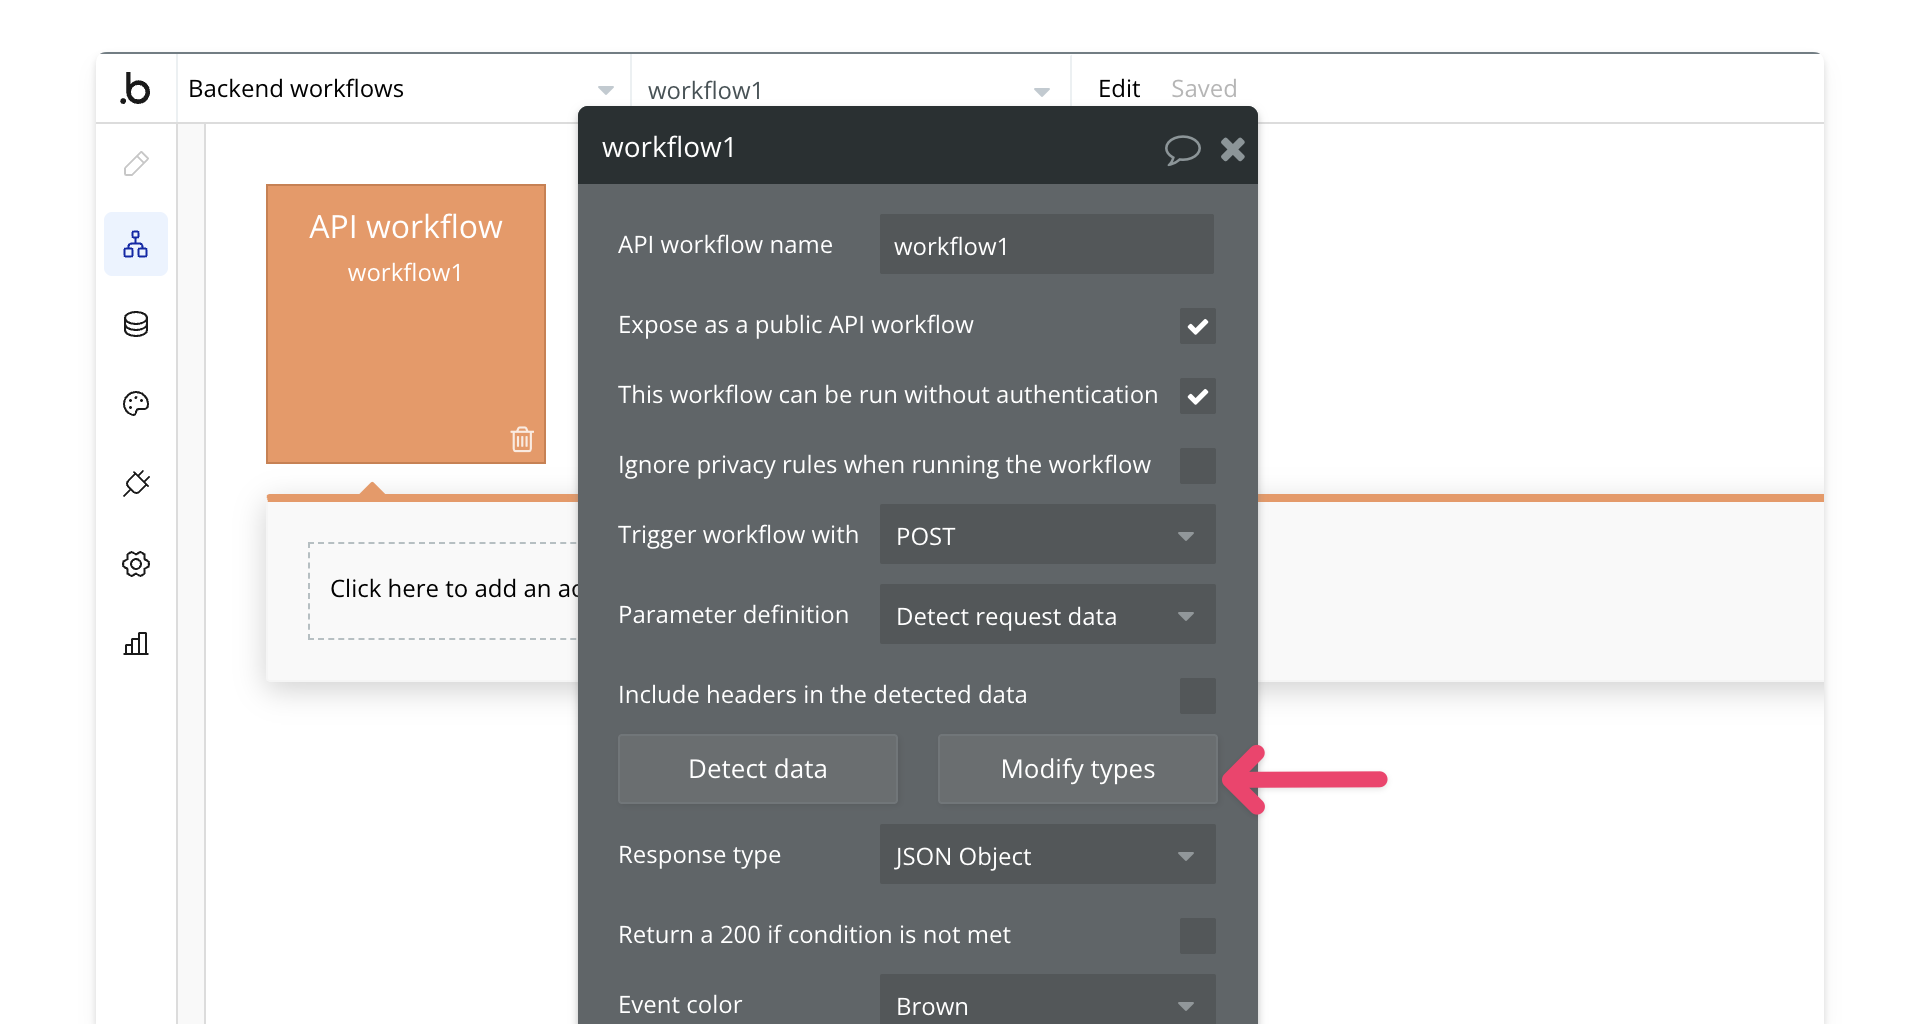 Next, select Edit Raw Data.
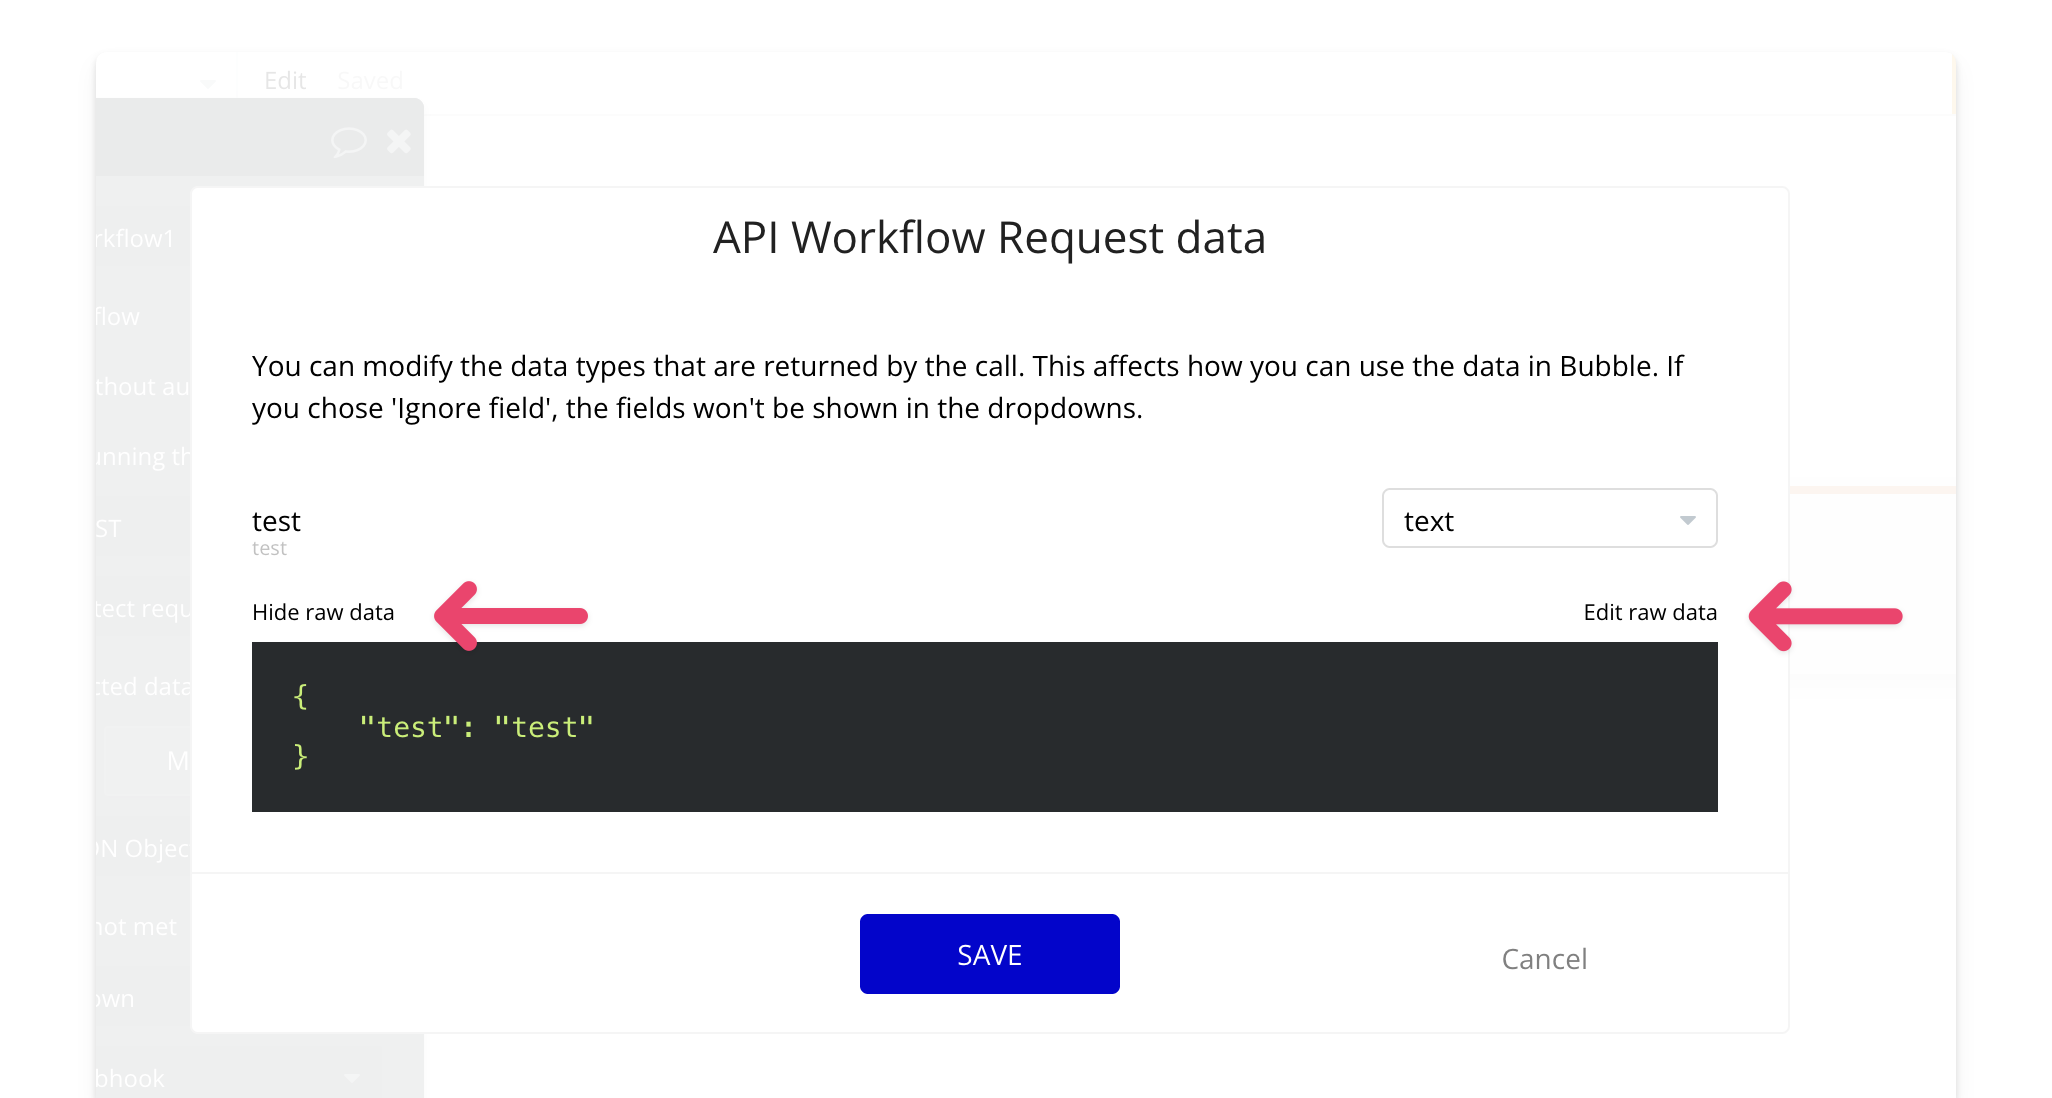 For each webhook event you want to handle, update the response to match the required payload format. You can find the payload format for specific event types in Daily’s documentation.
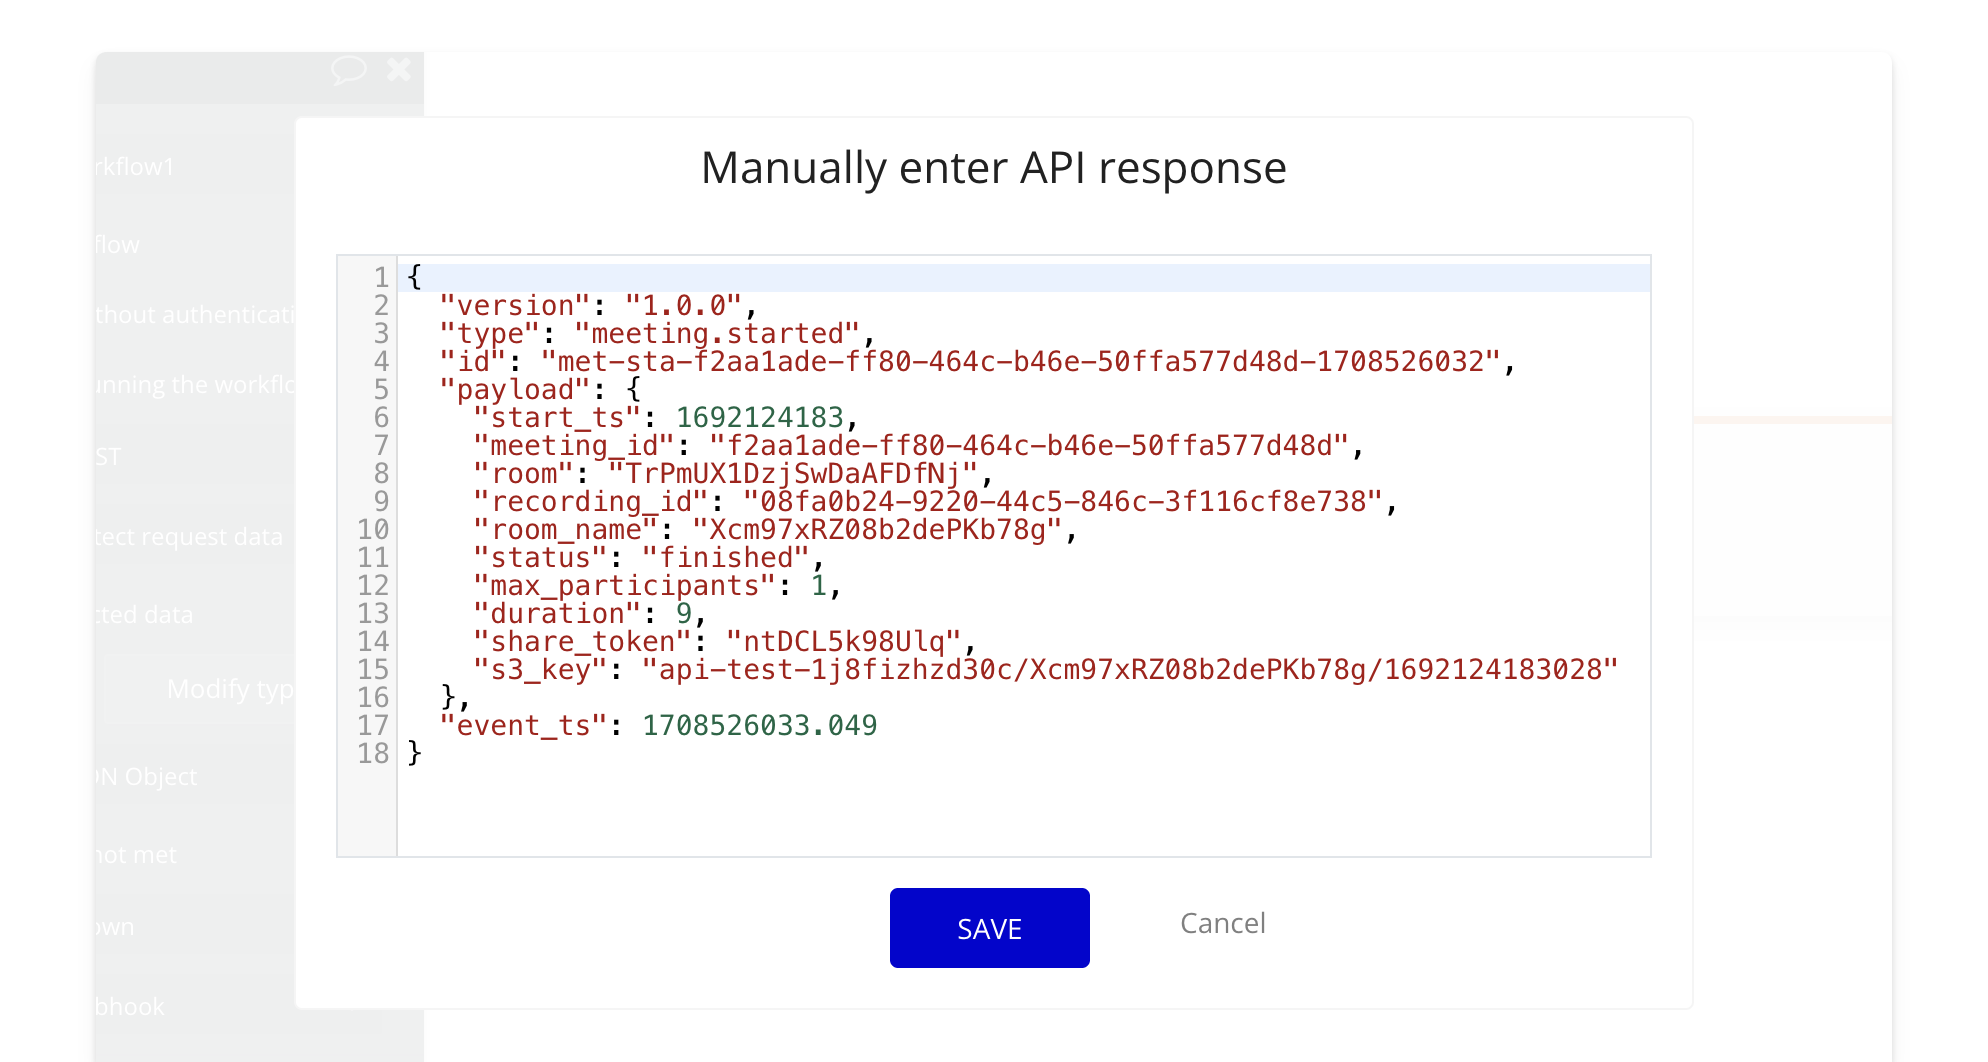 Example: Meeting Started Payload
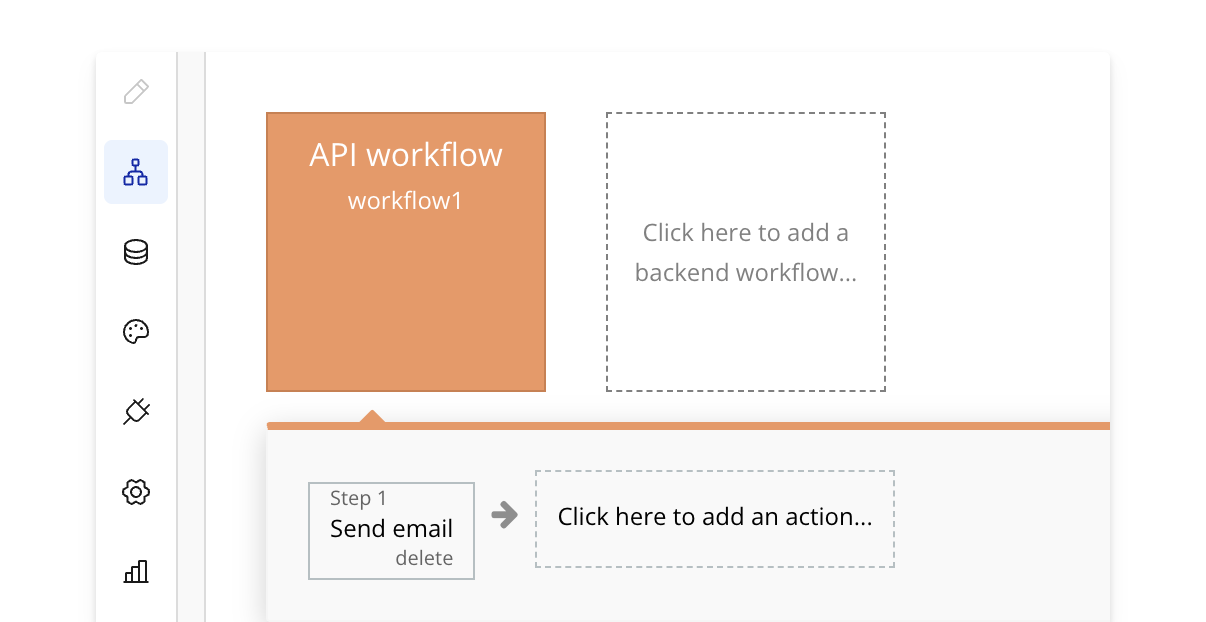
8. Finalize the Workflow
Your webhook is now successfully set up, and you can handle events in your app. For example, you could trigger an email notification or perform any other action when an event occurs.