🔐 Bundle plugin only: This is exclusive to the Video, Audio & Live
Bundle. Get the bundle
plugin
here.
Steps
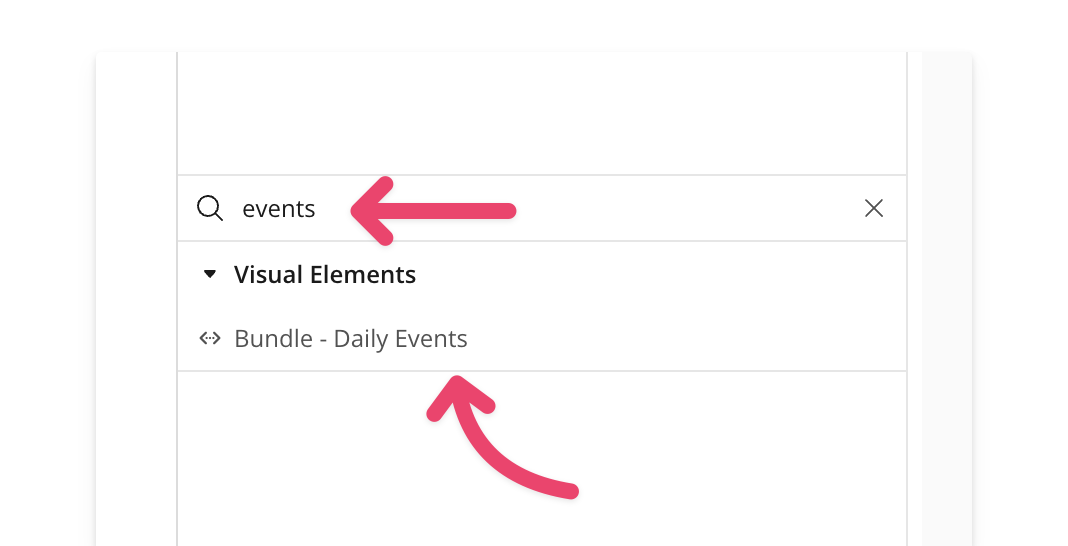
1. Add the Daily Events Element (Optional)
Place the events element element on your page. It’s common to put it inside a hidden popup so it stays offscreen but can still listen for events liketranscription-started, transcription-stopped, or transcription-error.
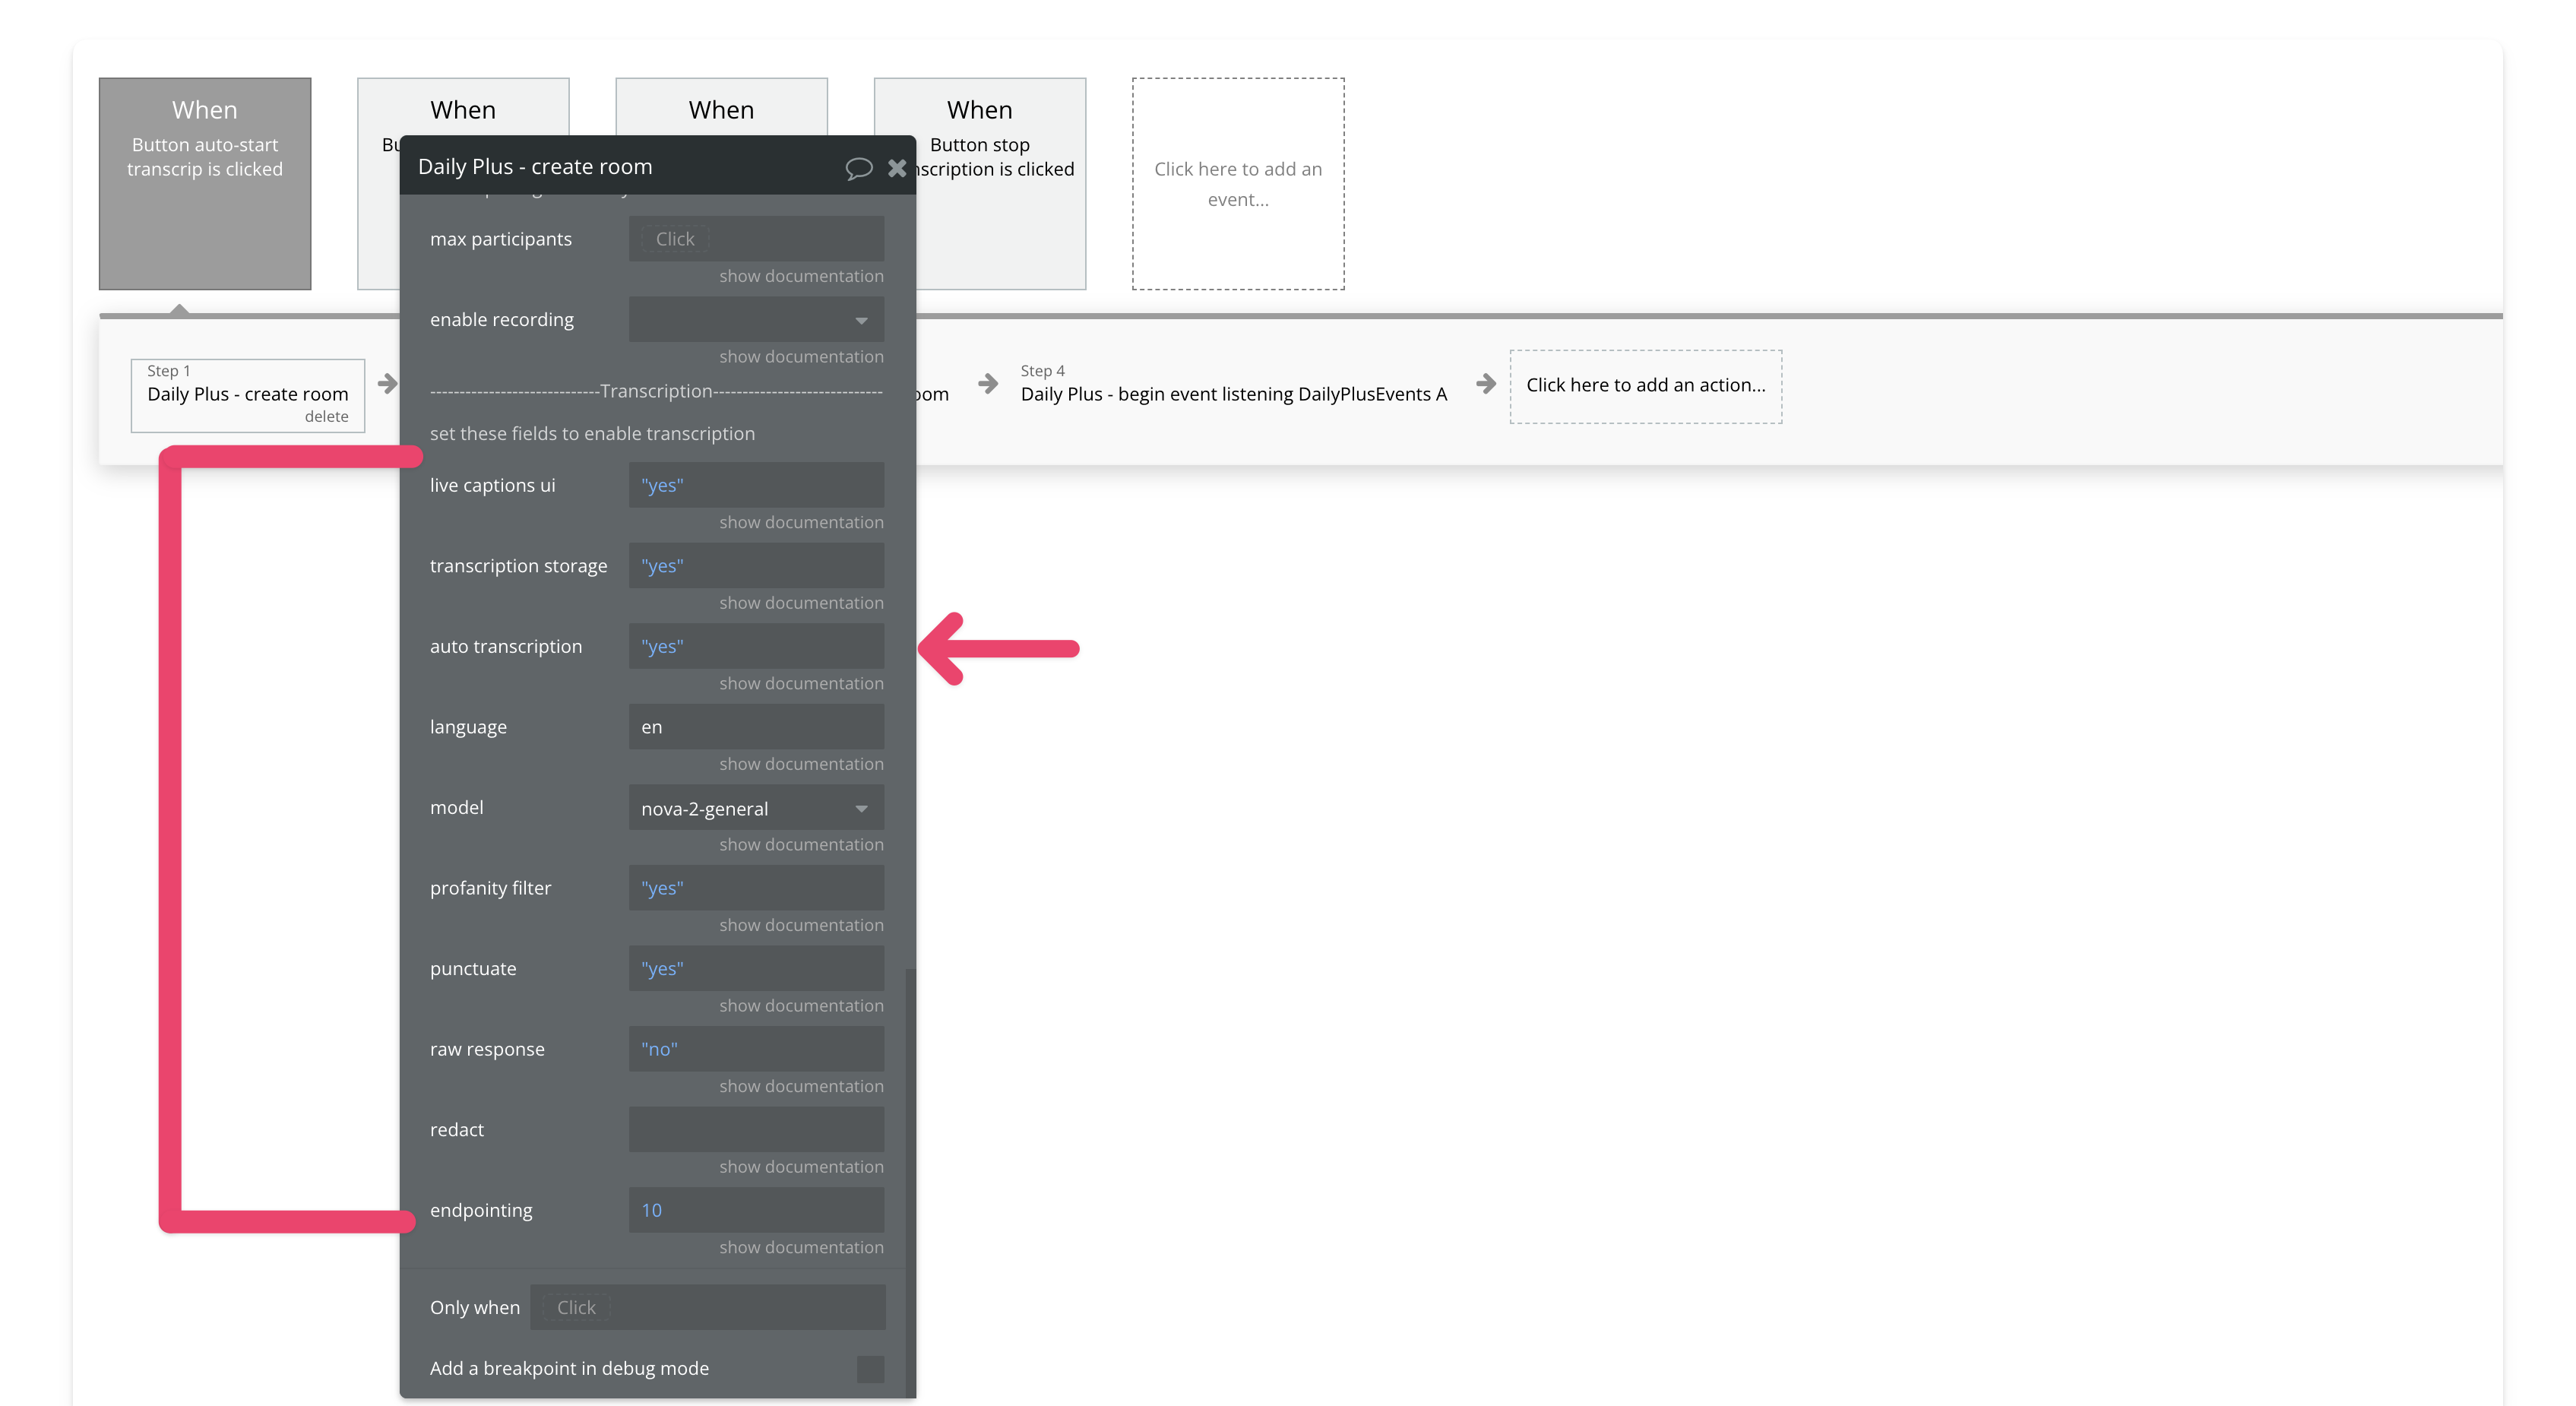
2. Enable Transcription in Your Room
Next, create or update a room and enable transcription. Be sure to set theauto transcription field to yes. For a full list of transcription fields, check the documentation.
3. Create a Meeting Token for the Transcription Owner
Create a meeting token with theis owner field set to yes and auto-start transcription set to yes. If you want live captions, make sure to enable them too. Only meeting owners can start transcriptions in this plugin.

4. Join the Meeting
Join a room . Make sure to input the room URL from Step 2 and the meeting token from Step 3.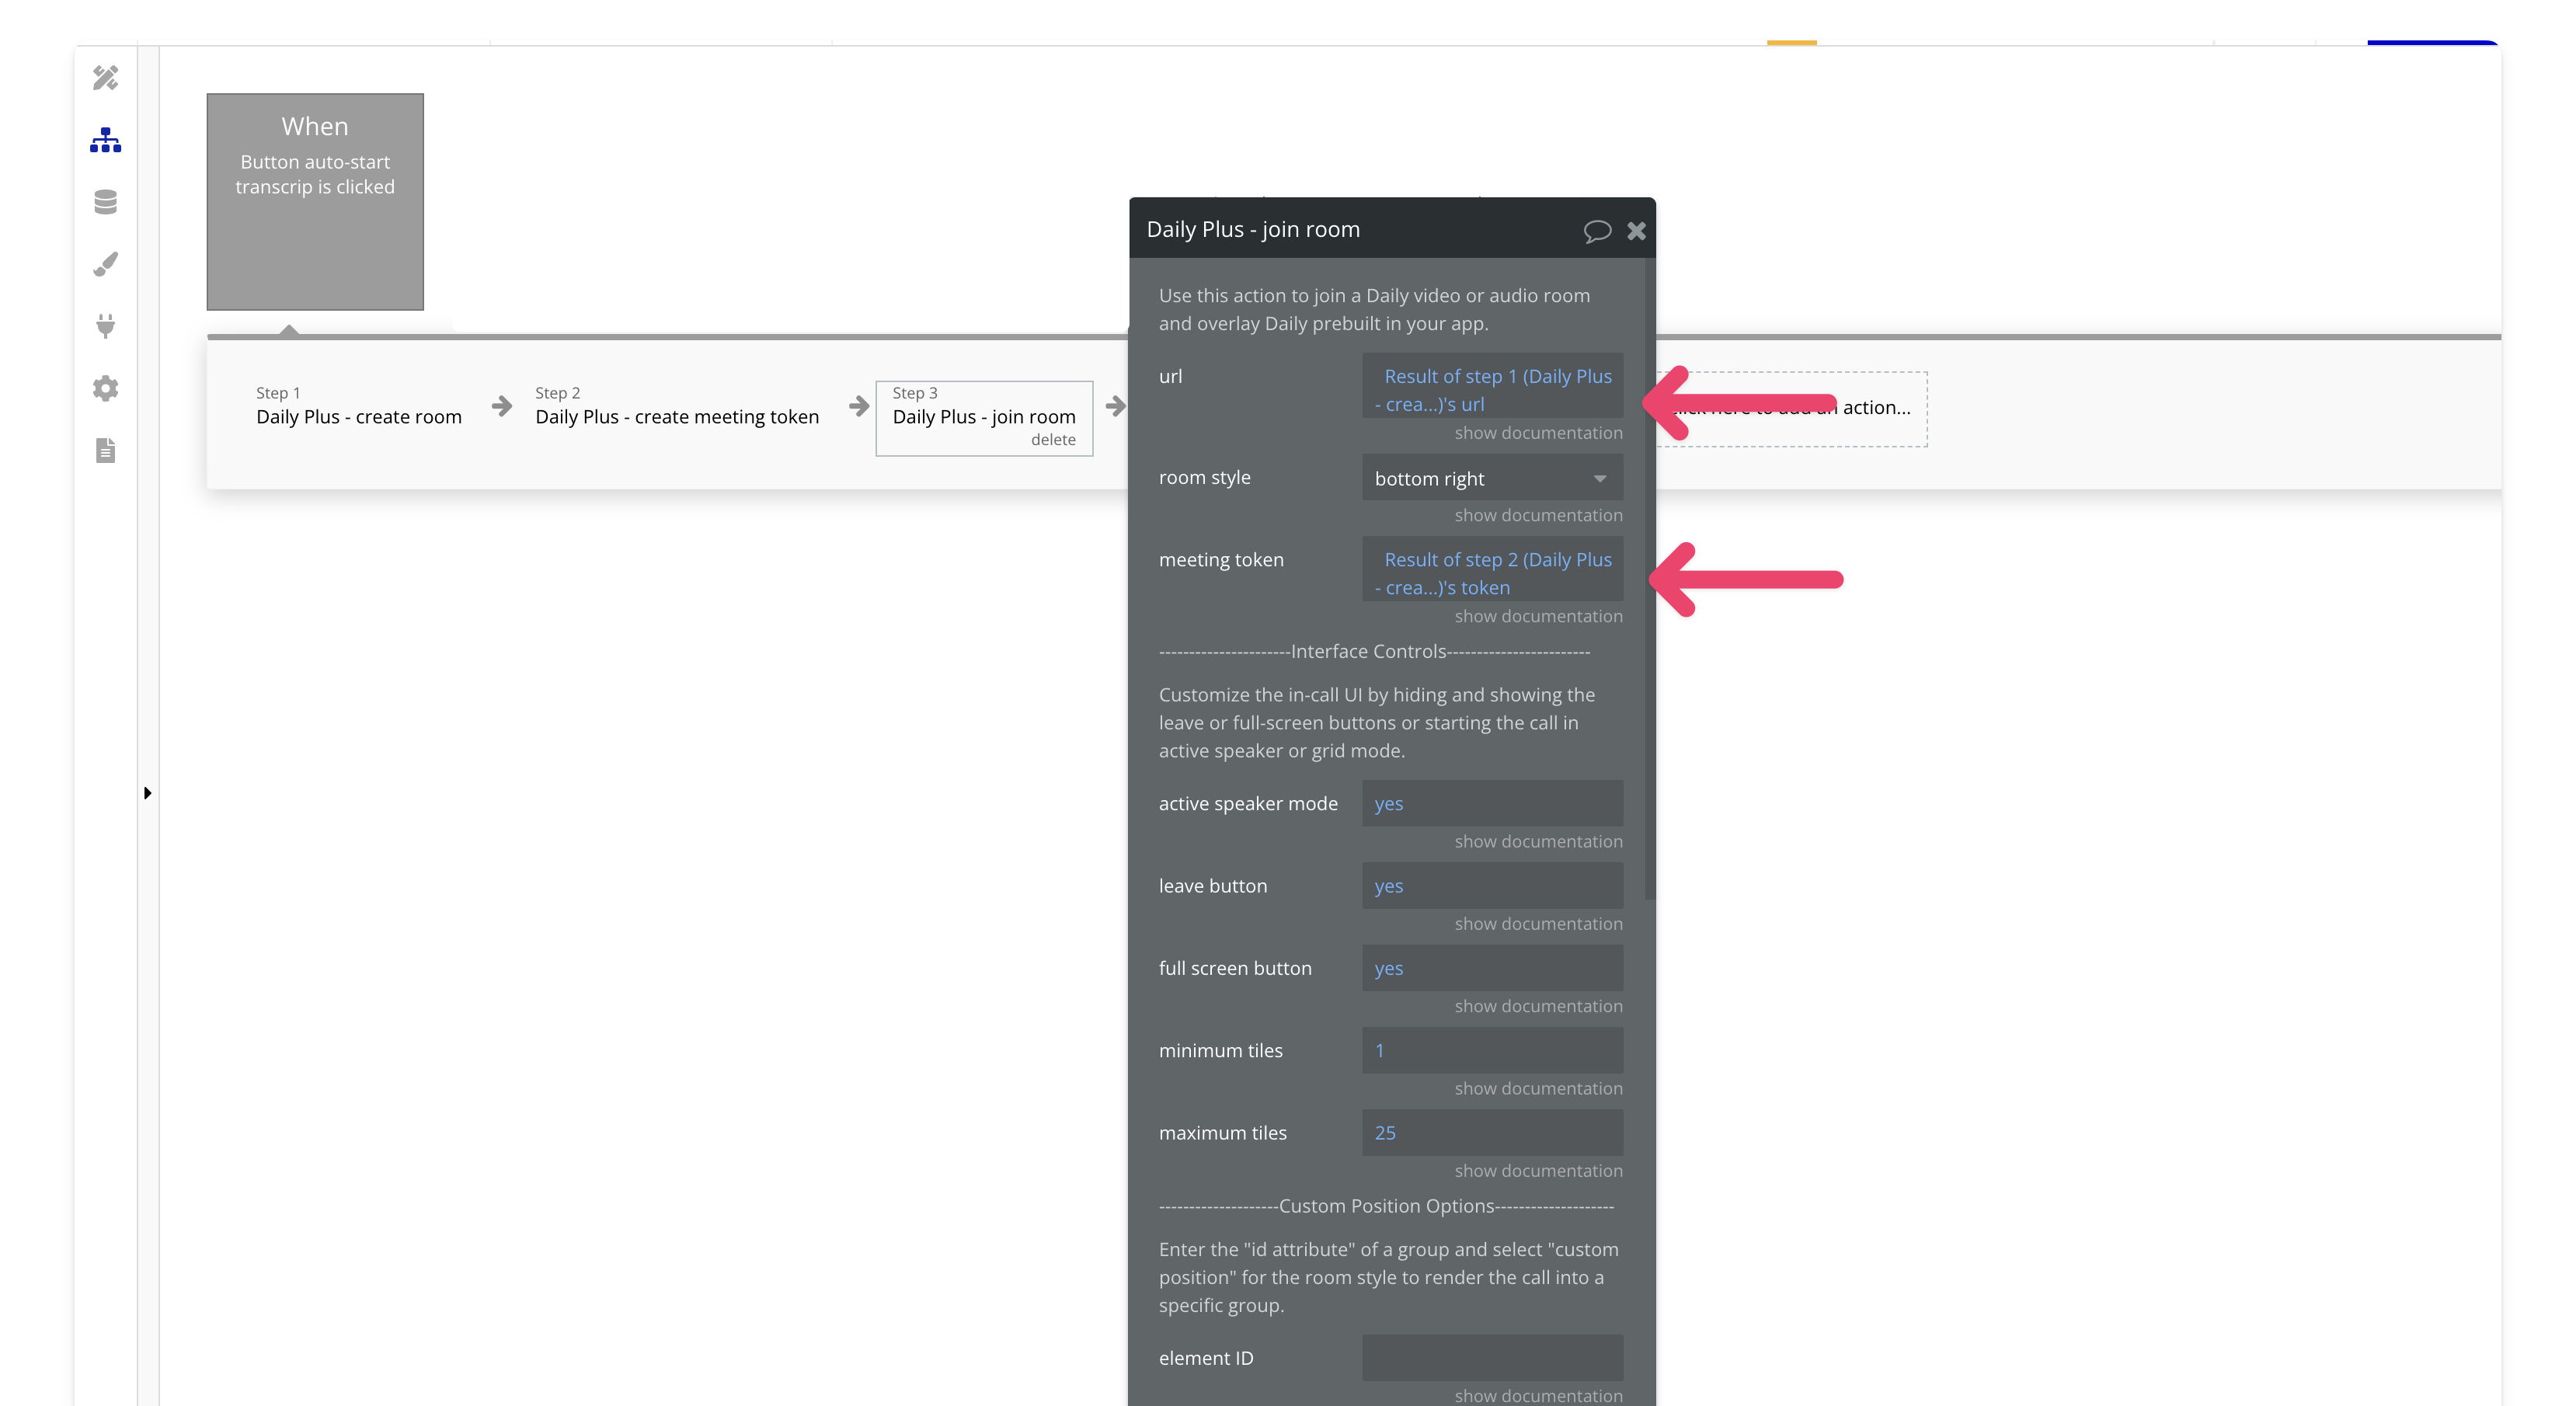
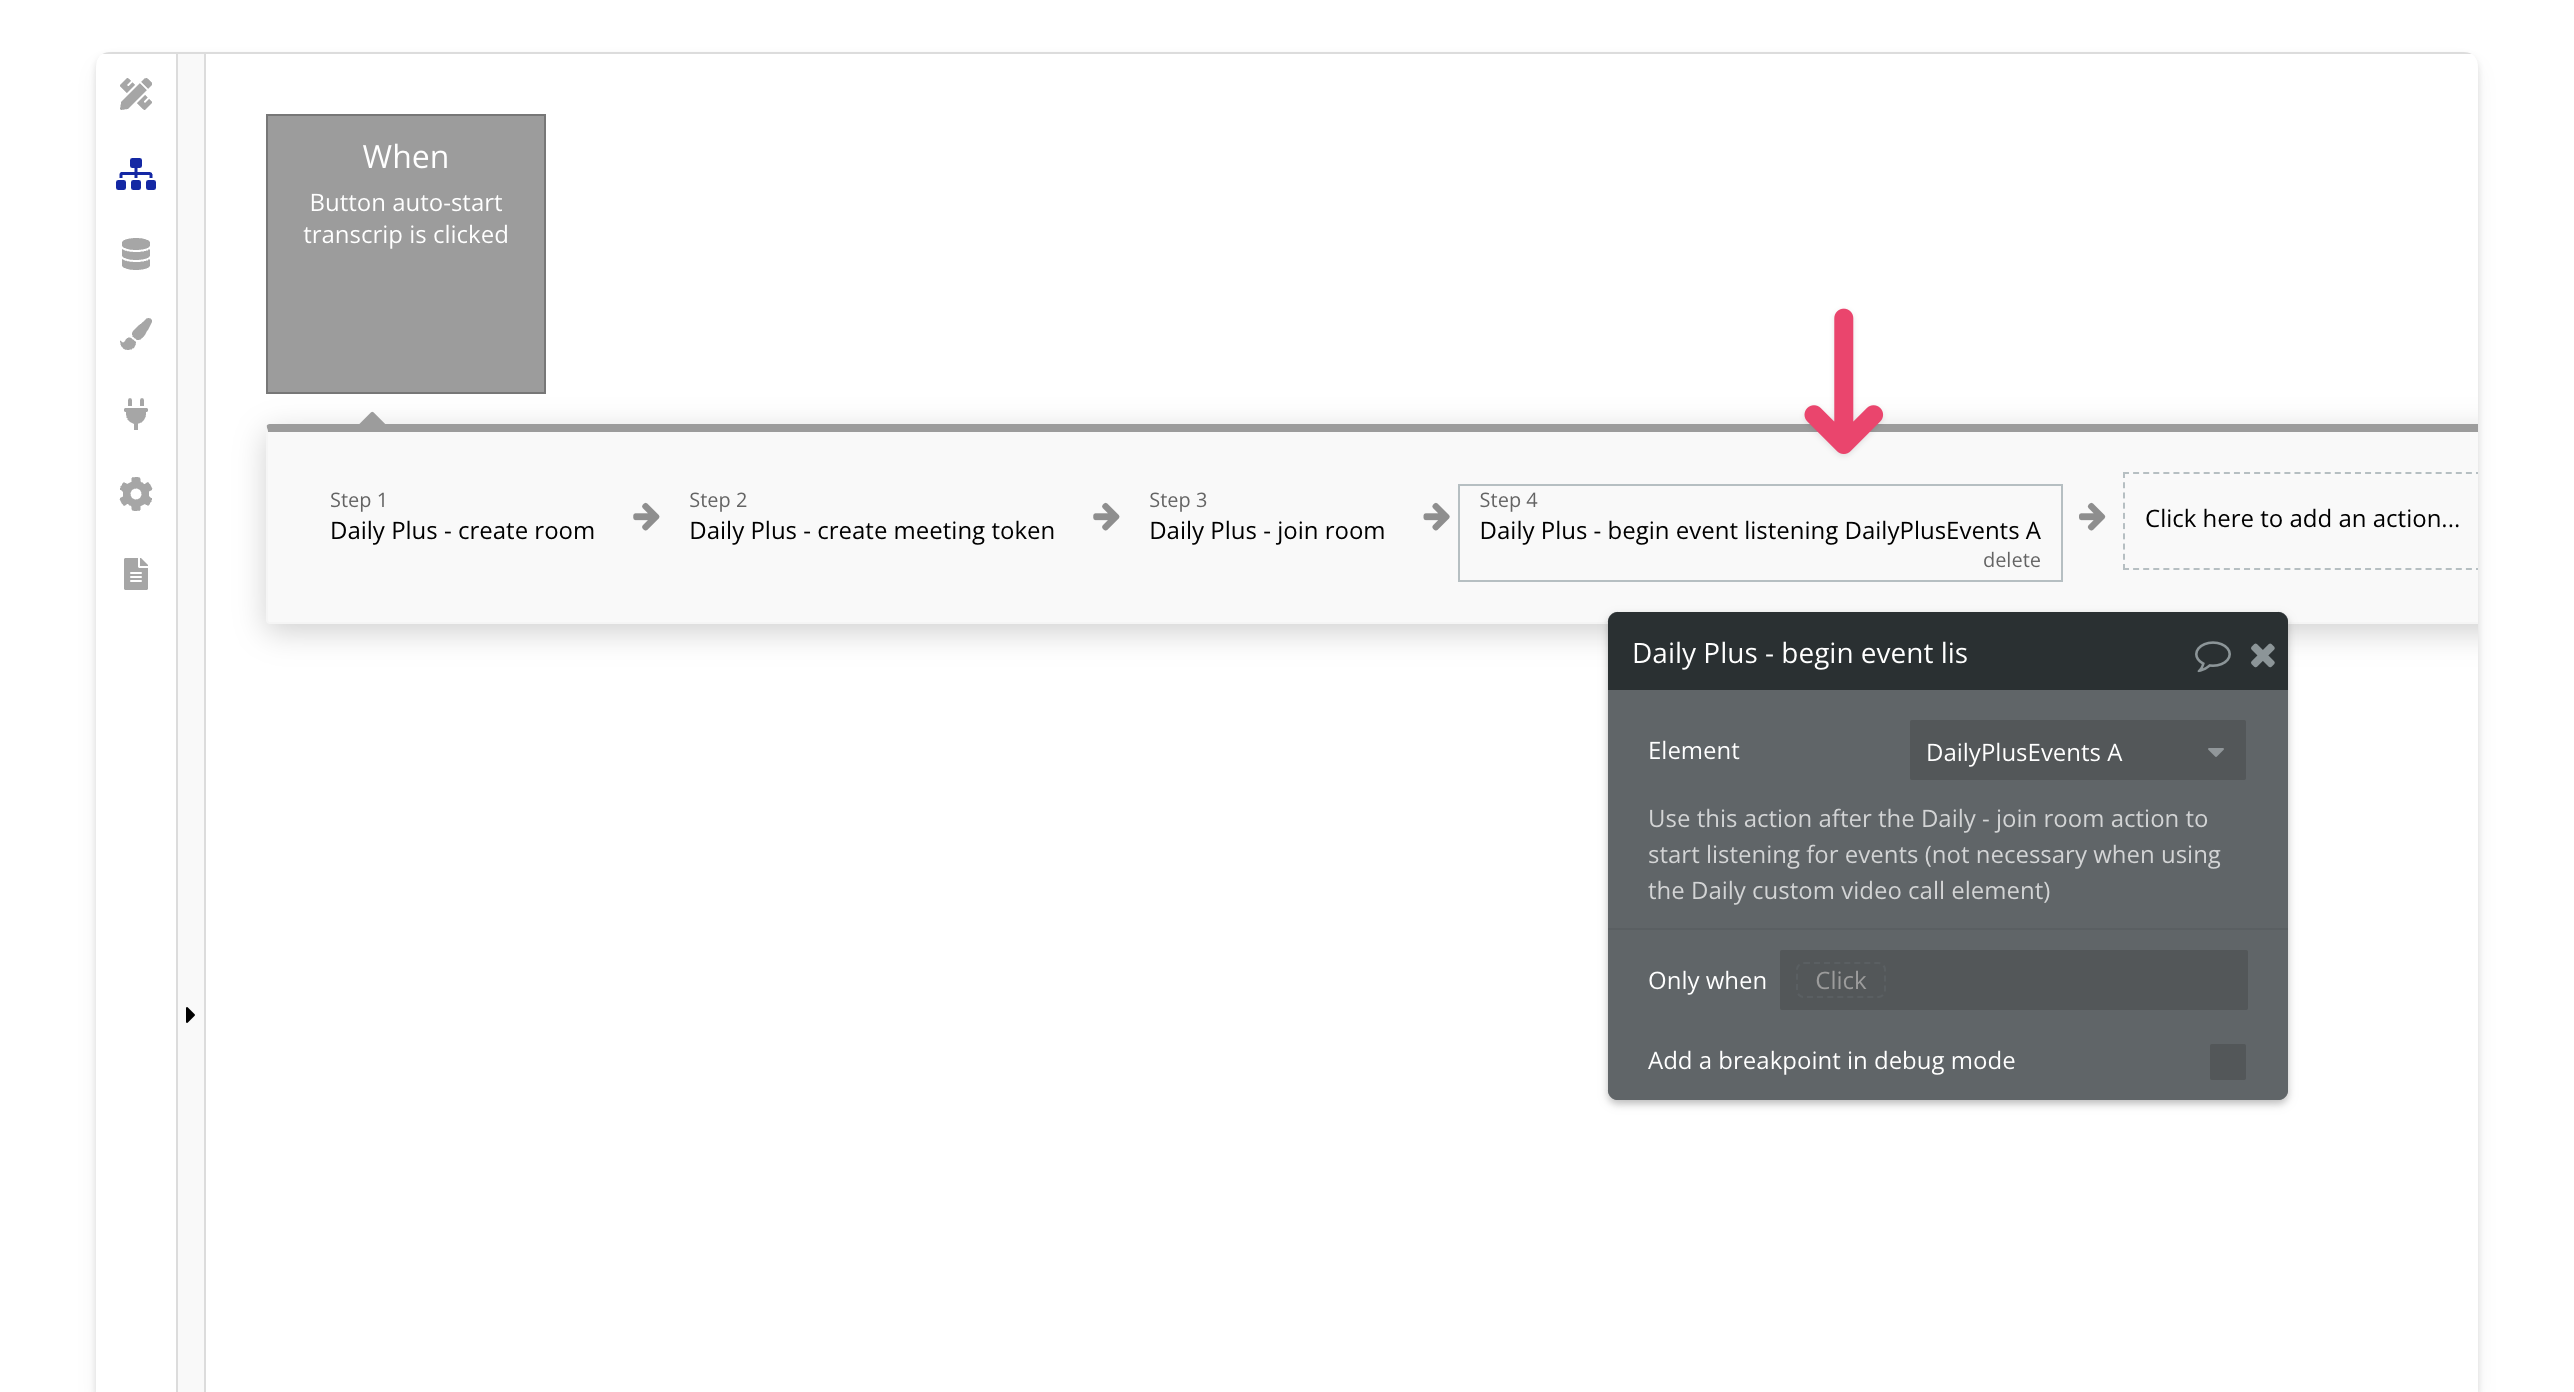
5. Begin Listening for Events (Optional)
If you want to listen to transcription events, add the begin event listening action after joining the room.