Otherwise, continue reading for detailed instructions.
1. Access the Plugins Tab
To get started, navigate to the Plugins tab in your Bubble app. This is where you will manage and install plugins, including the API Connector for extending the Daily plugin.
2. Install the API Connector Plugin
If you haven’t already installed the API Connector plugin, follow these steps:- Click ‘Add Plugins’ in the plugin management interface.
- Search for ‘API Connector’.
- Click ‘Install’ to add it to your app.

3. Configure a New API
Once the API Connector is installed, you’ll need to configure a new API call. Click ‘Add another API’ to begin the setup process.
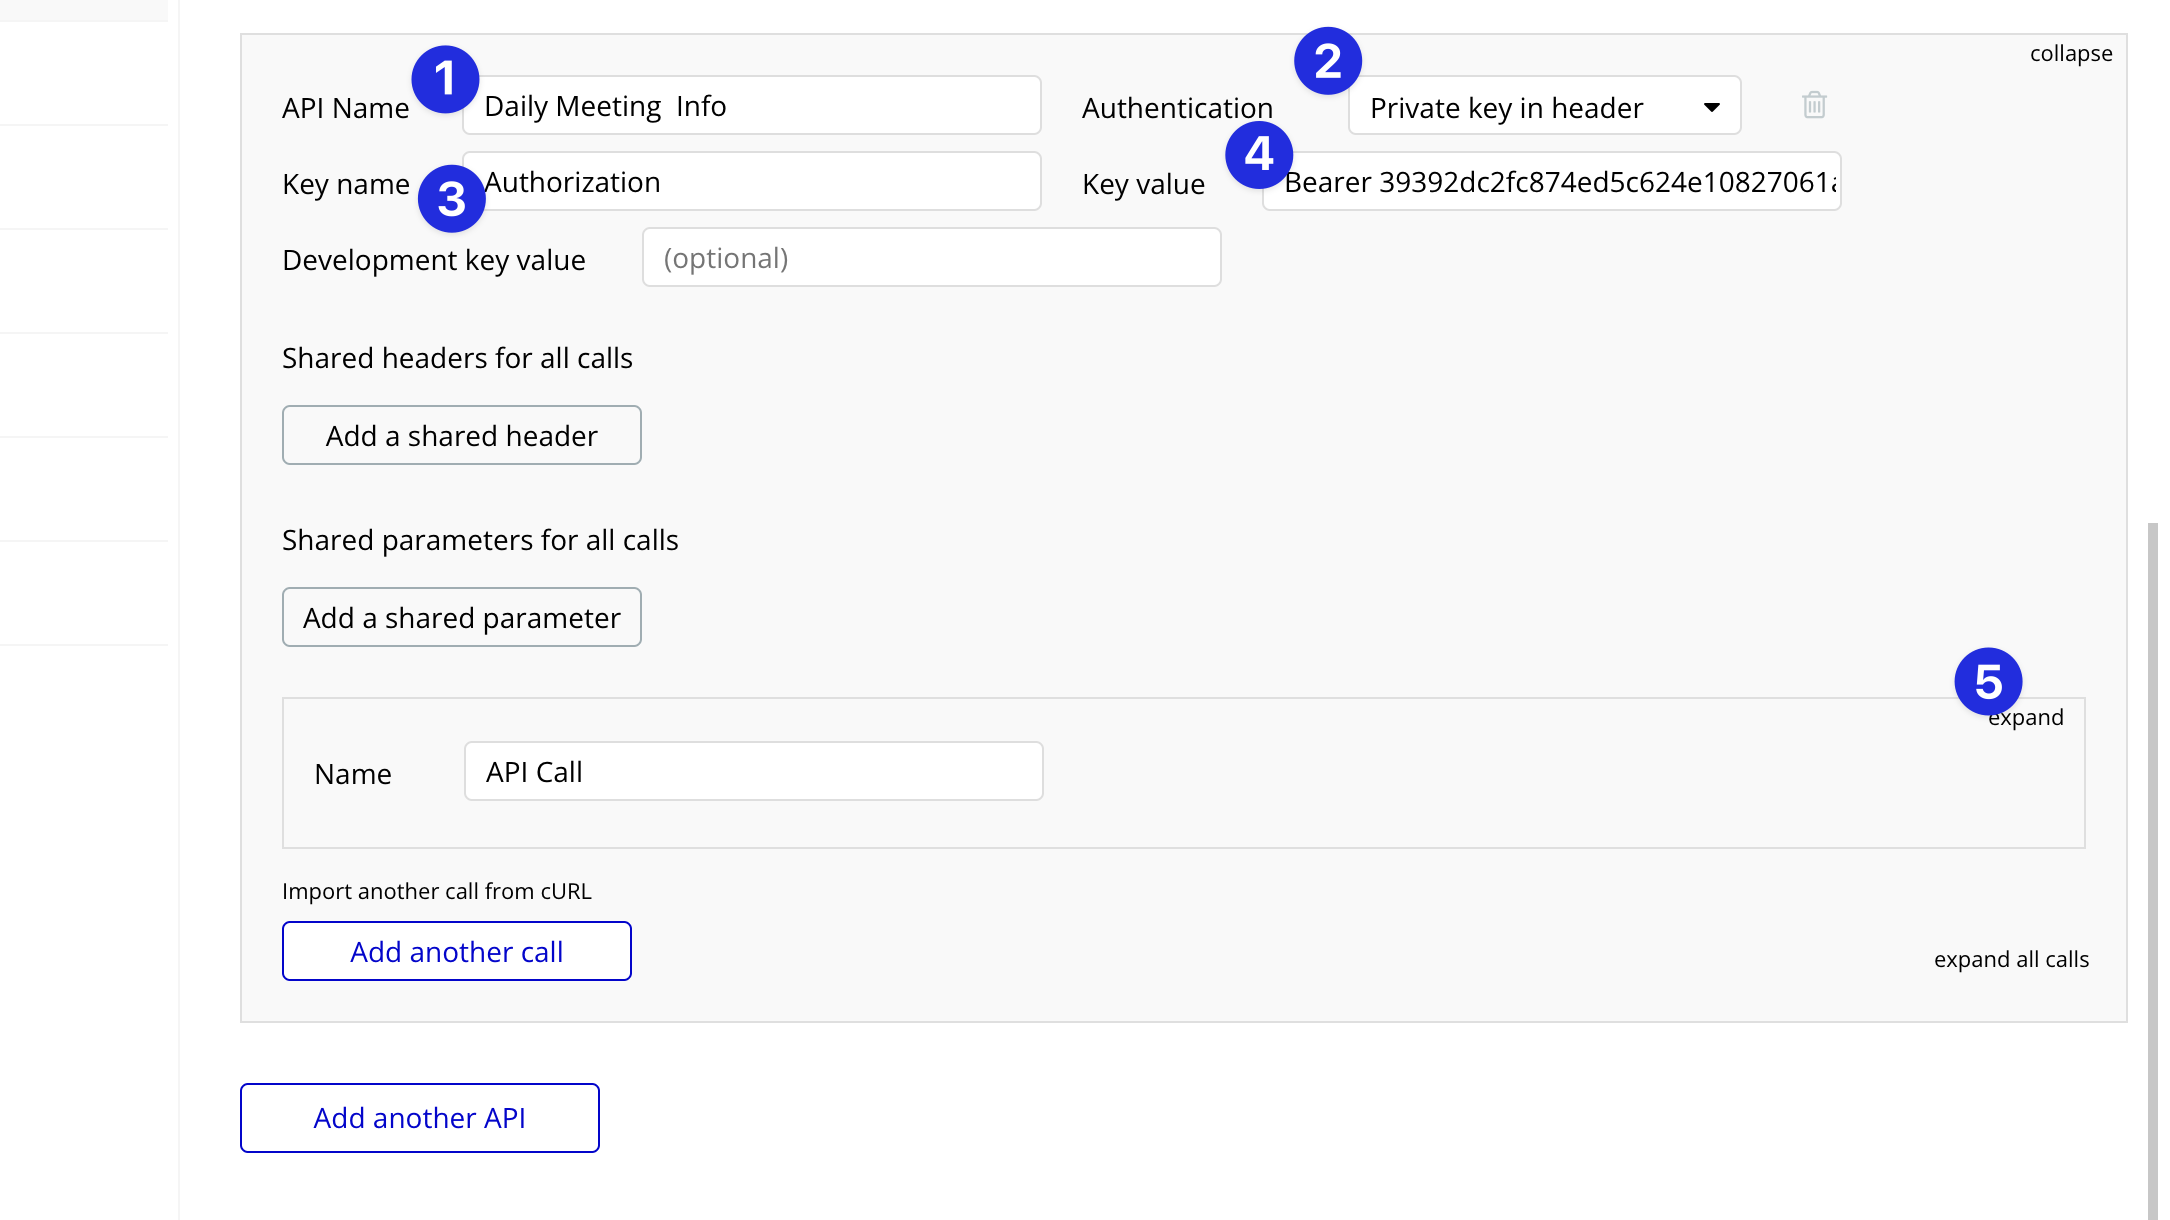
4. Fill Out API Header Details
Configure the API call header to authenticate your Daily API requests:- API Name: Choose a memorable name for this API integration.
- Authentication: Set this to ‘Private key in header’.
- Key: Use ‘Authorization’ for the key.
- Key Value: Enter ‘Bearer [Your API Key]’. You can find your API key on your Daily developer dashboard.
- Click ‘Expand’ to configure the API call details.

5. Set Up the API Call
Now, you’ll set up the actual API call:- Name: Give the API call a clear name, such as ‘Get Meeting Info’.
- Use as: Select ‘Action’ if you’ll use this in a workflow, or ‘Data’ to use it as a data source.
- Method and Endpoint: For fetching meeting information, use a GET method and the endpoint
https://api.daily.co/v1/meetings. - Click ‘Initialize call’ to make the API available within your app.
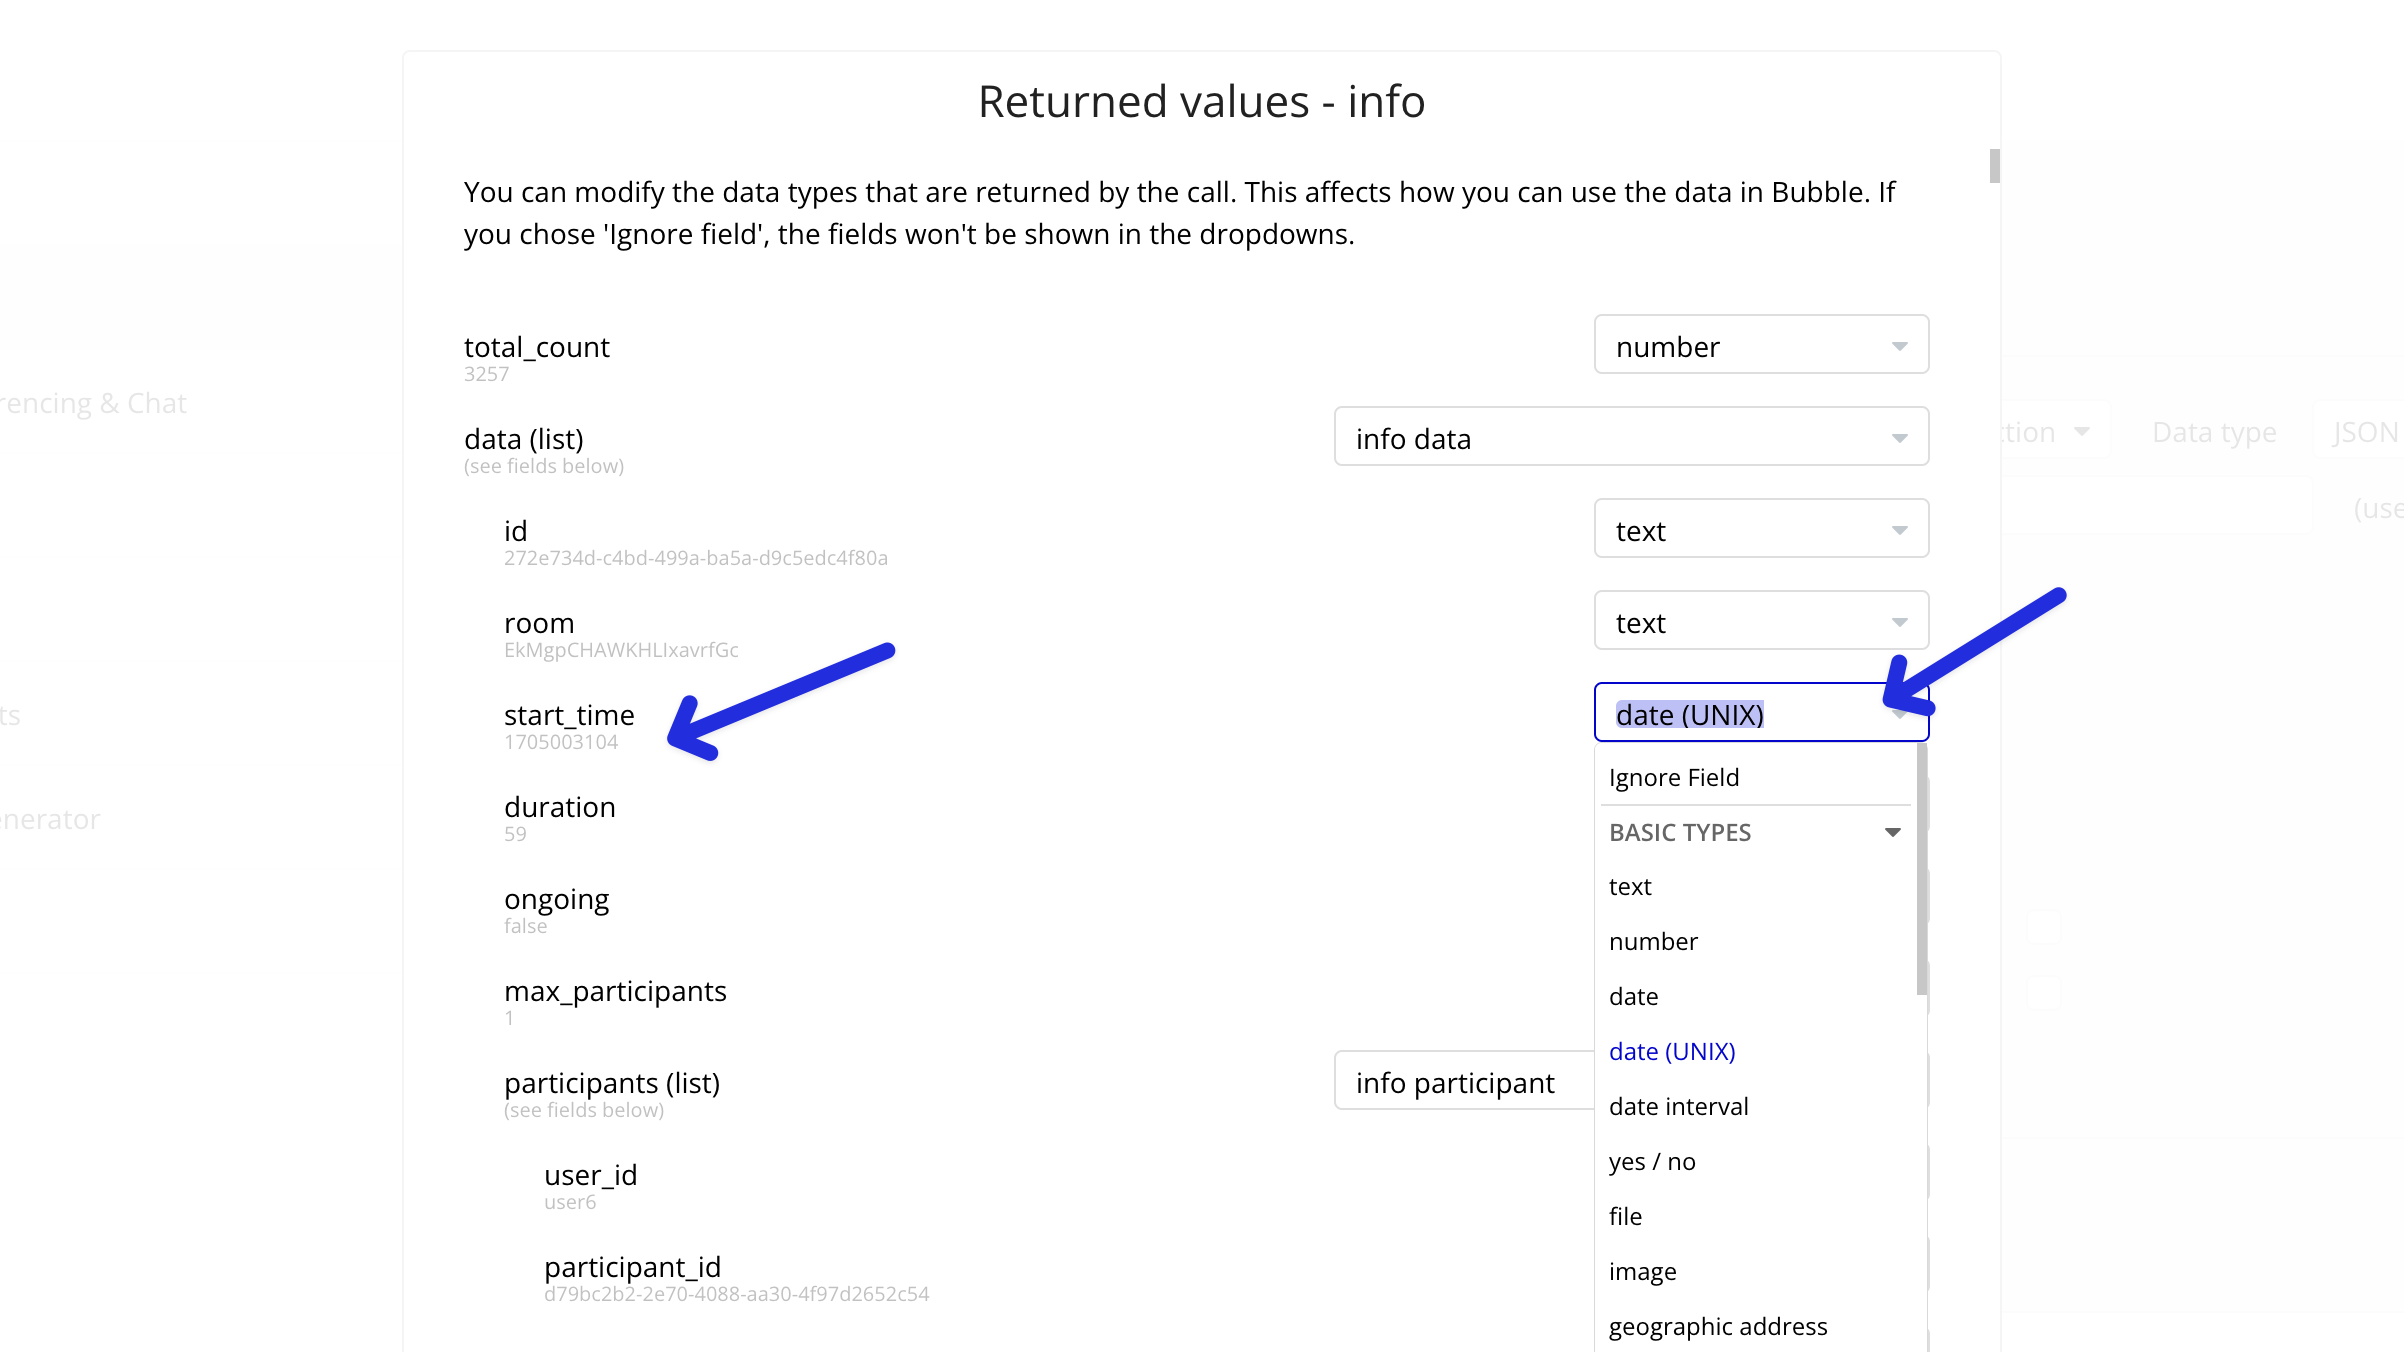
6. Format API Types
Ensure that any date fields, such as meeting start and join times, are formatted as Unix timestamps. This will make it easier to display them as readable dates within your Bubble app.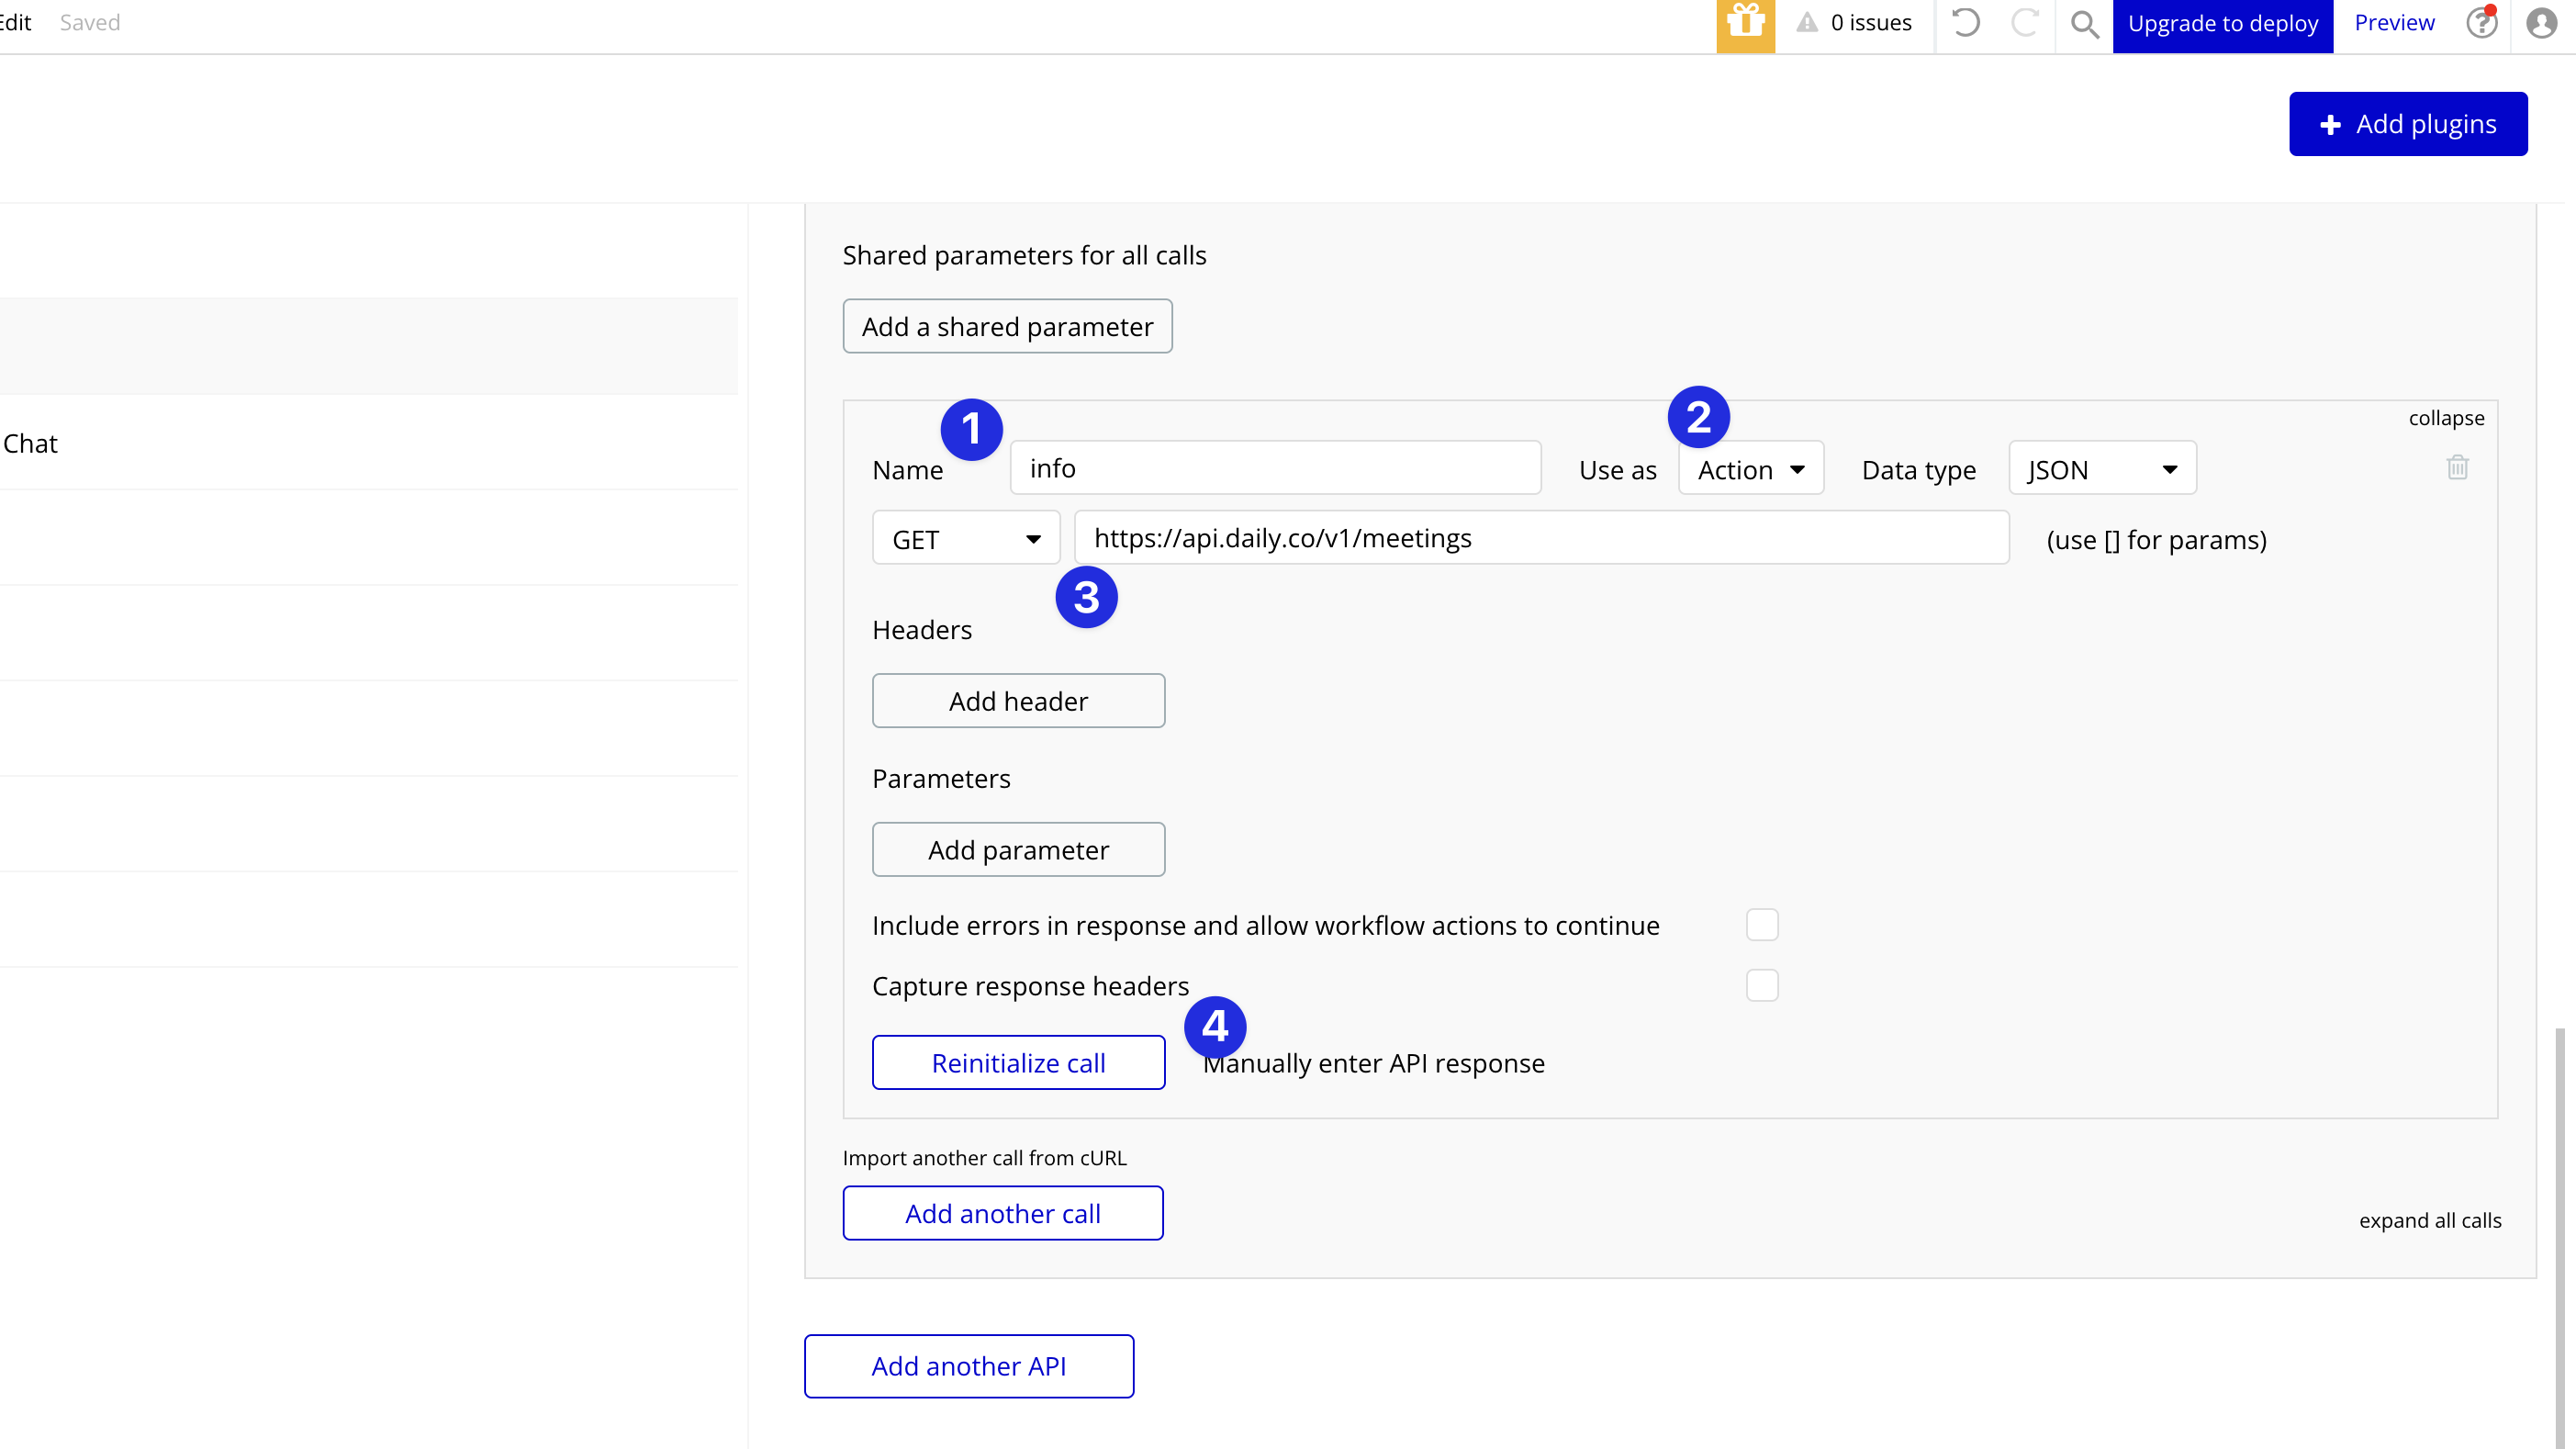
7. Using the Custom API Call
Now that your API call is set up, you can use it within your Bubble app as either an action in workflows or as a data source.Use as Action Example
- In your workflow, add an action that triggers the API call by selecting the name you assigned during setup.
- Use the resulting data from the API call as needed within your workflow logic.
Use as Data Example
- Add a group to your page that requires a data source. The data type should match the name of the API call you set up.
- Set the data source to ‘Get external data from API’ and select the custom API call.
- Populate the elements inside the group (e.g., text elements) with the data returned from the API.
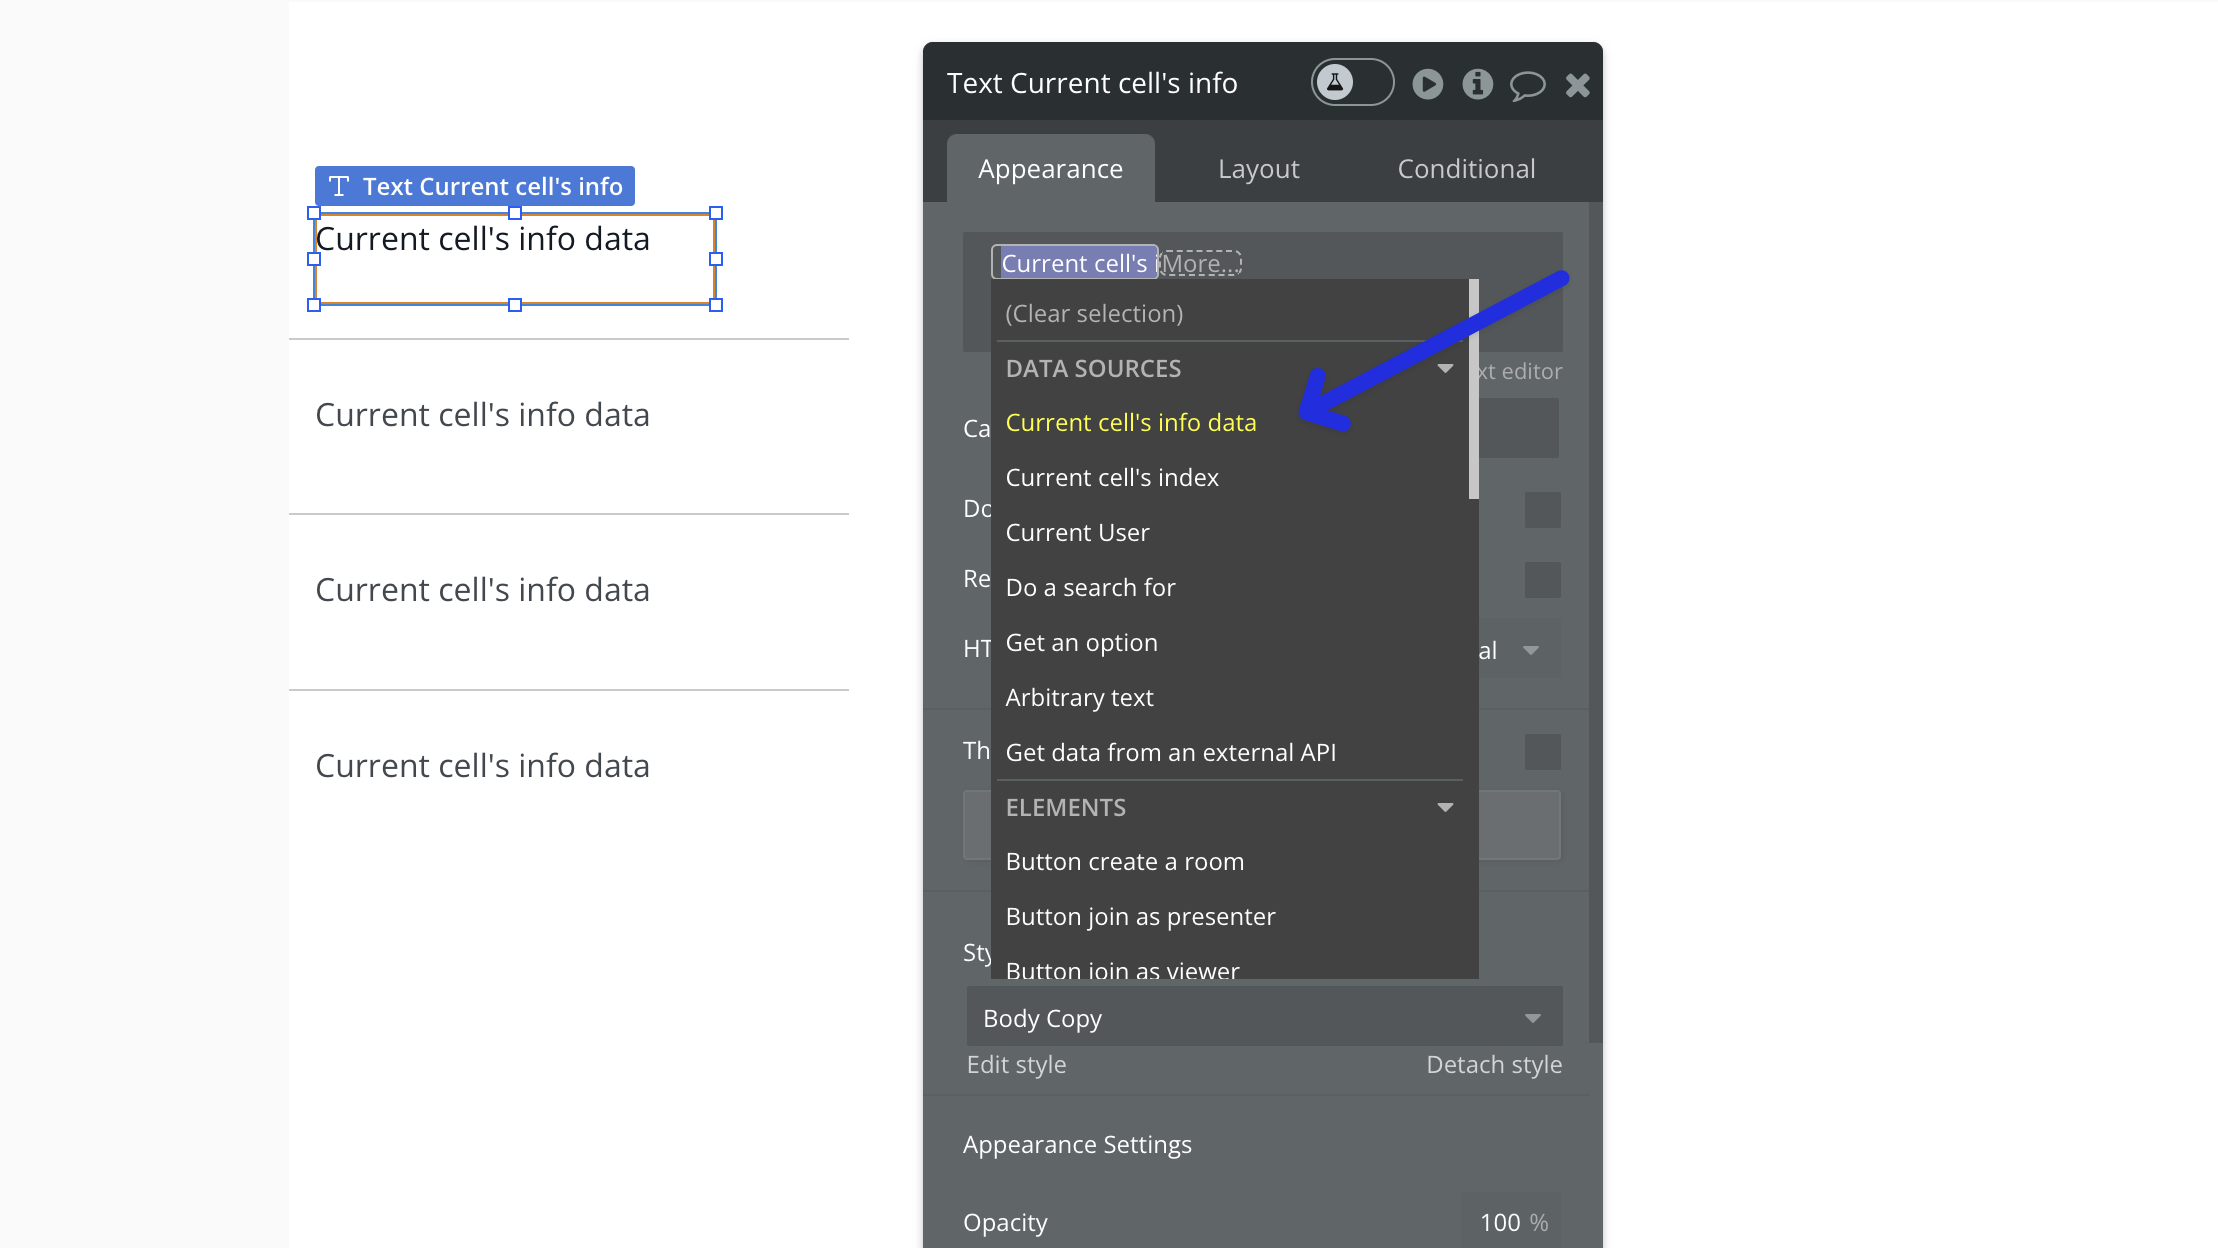
 In the case where the API returns multiple objects, you can set the data source to a list and display each object in a repeating group.
 Inside the repeating group, add elements such as text fields to display specific information, like the meeting start time.