Two Approaches to Time Limits
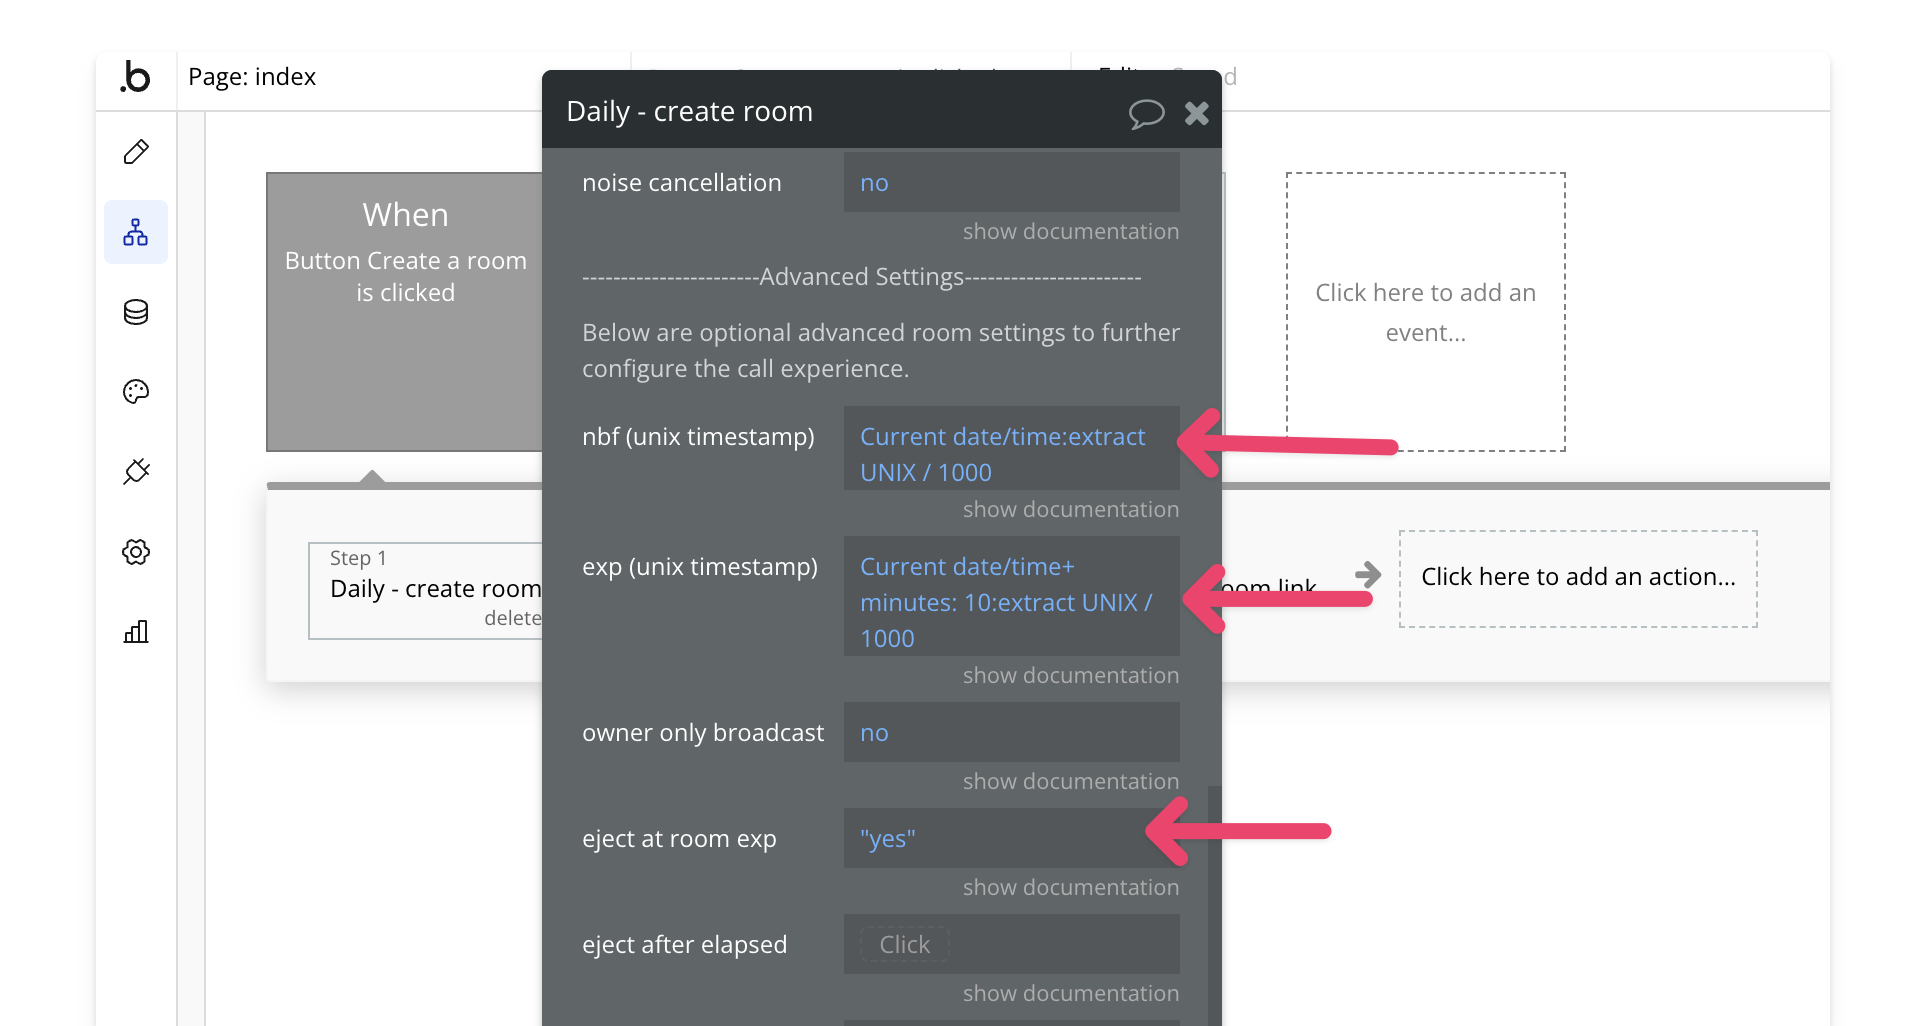
There are two main ways to control the duration of your Daily video calls:- Fixed Start and End Times: Set specific times when the room becomes available and when it expires. This is useful for scheduled meetings or events with defined time slots.
- Elapsed Time Limit: Set a maximum duration for how long each participant can stay in the call, counting from when they join. This is helpful for scenarios like consultation sessions or time-limited meetings.
Setting Fixed Start and End Times
1. Calculate Your Timestamps
First, you’ll need to convert your desired start and end times to UNIX timestamps. In Bubble, you can do this using:Date/Time: Extract UNIX timestamp/1000
2. Create or Update the Room
When creating a room or updating an existing room, set these parameters:- Set
not beforeto your start time timestamp - Set
expiresto your end time timestamp - Set
eject at exptoyesto automatically remove participants when the room expires

Setting an Elapsed Time Limit
1. Create or Update the Room
When creating or updating your room:- Set
eject after elapsed timeto the number of seconds you want participants to be able to stay in the call - For example, for a 30-minute limit, set it to
1800(30 minutes × 60 seconds)
 When the time limit is reached, participants will be automatically removed from the call.

