Difference Between a Broadcast and a Live Stream
A broadcast allows only the owner to share their audio and video, while other participants can view the content without interaction. This is a closed environment where the stream is accessible to participants who are part of the room. A live stream, on the other hand, transmits video content to an external platform like YouTube or Twitch. Anyone with access to the stream link can view the content in real time, regardless of whether they are part of the room. Live streaming is typically used to reach a larger audience, while broadcasts are more controlled and limited to specific participants. If you want to create a livestream, check out our guide on how to set up a livestream.Steps
1. Create a new room and set “Owner Only Broadcast” to yes
Create a new room or update an existing room, make sure to set the owner only broadcast field to yes. This restricts broadcasting to the room owner only.

Create a meeting token where theis owner field to yes
Next, you will need to create a meeting token for the room that you set in step 1. ensure that the is owner field is also set to yes. This step identifies the user as the room owner, enabling broadcasting privileges.

Join the room and add the meeting owner token
When you join the room, pass the same token in themeeting token field. This confirms the user as the owner, enabling them to broadcast their audio and video.
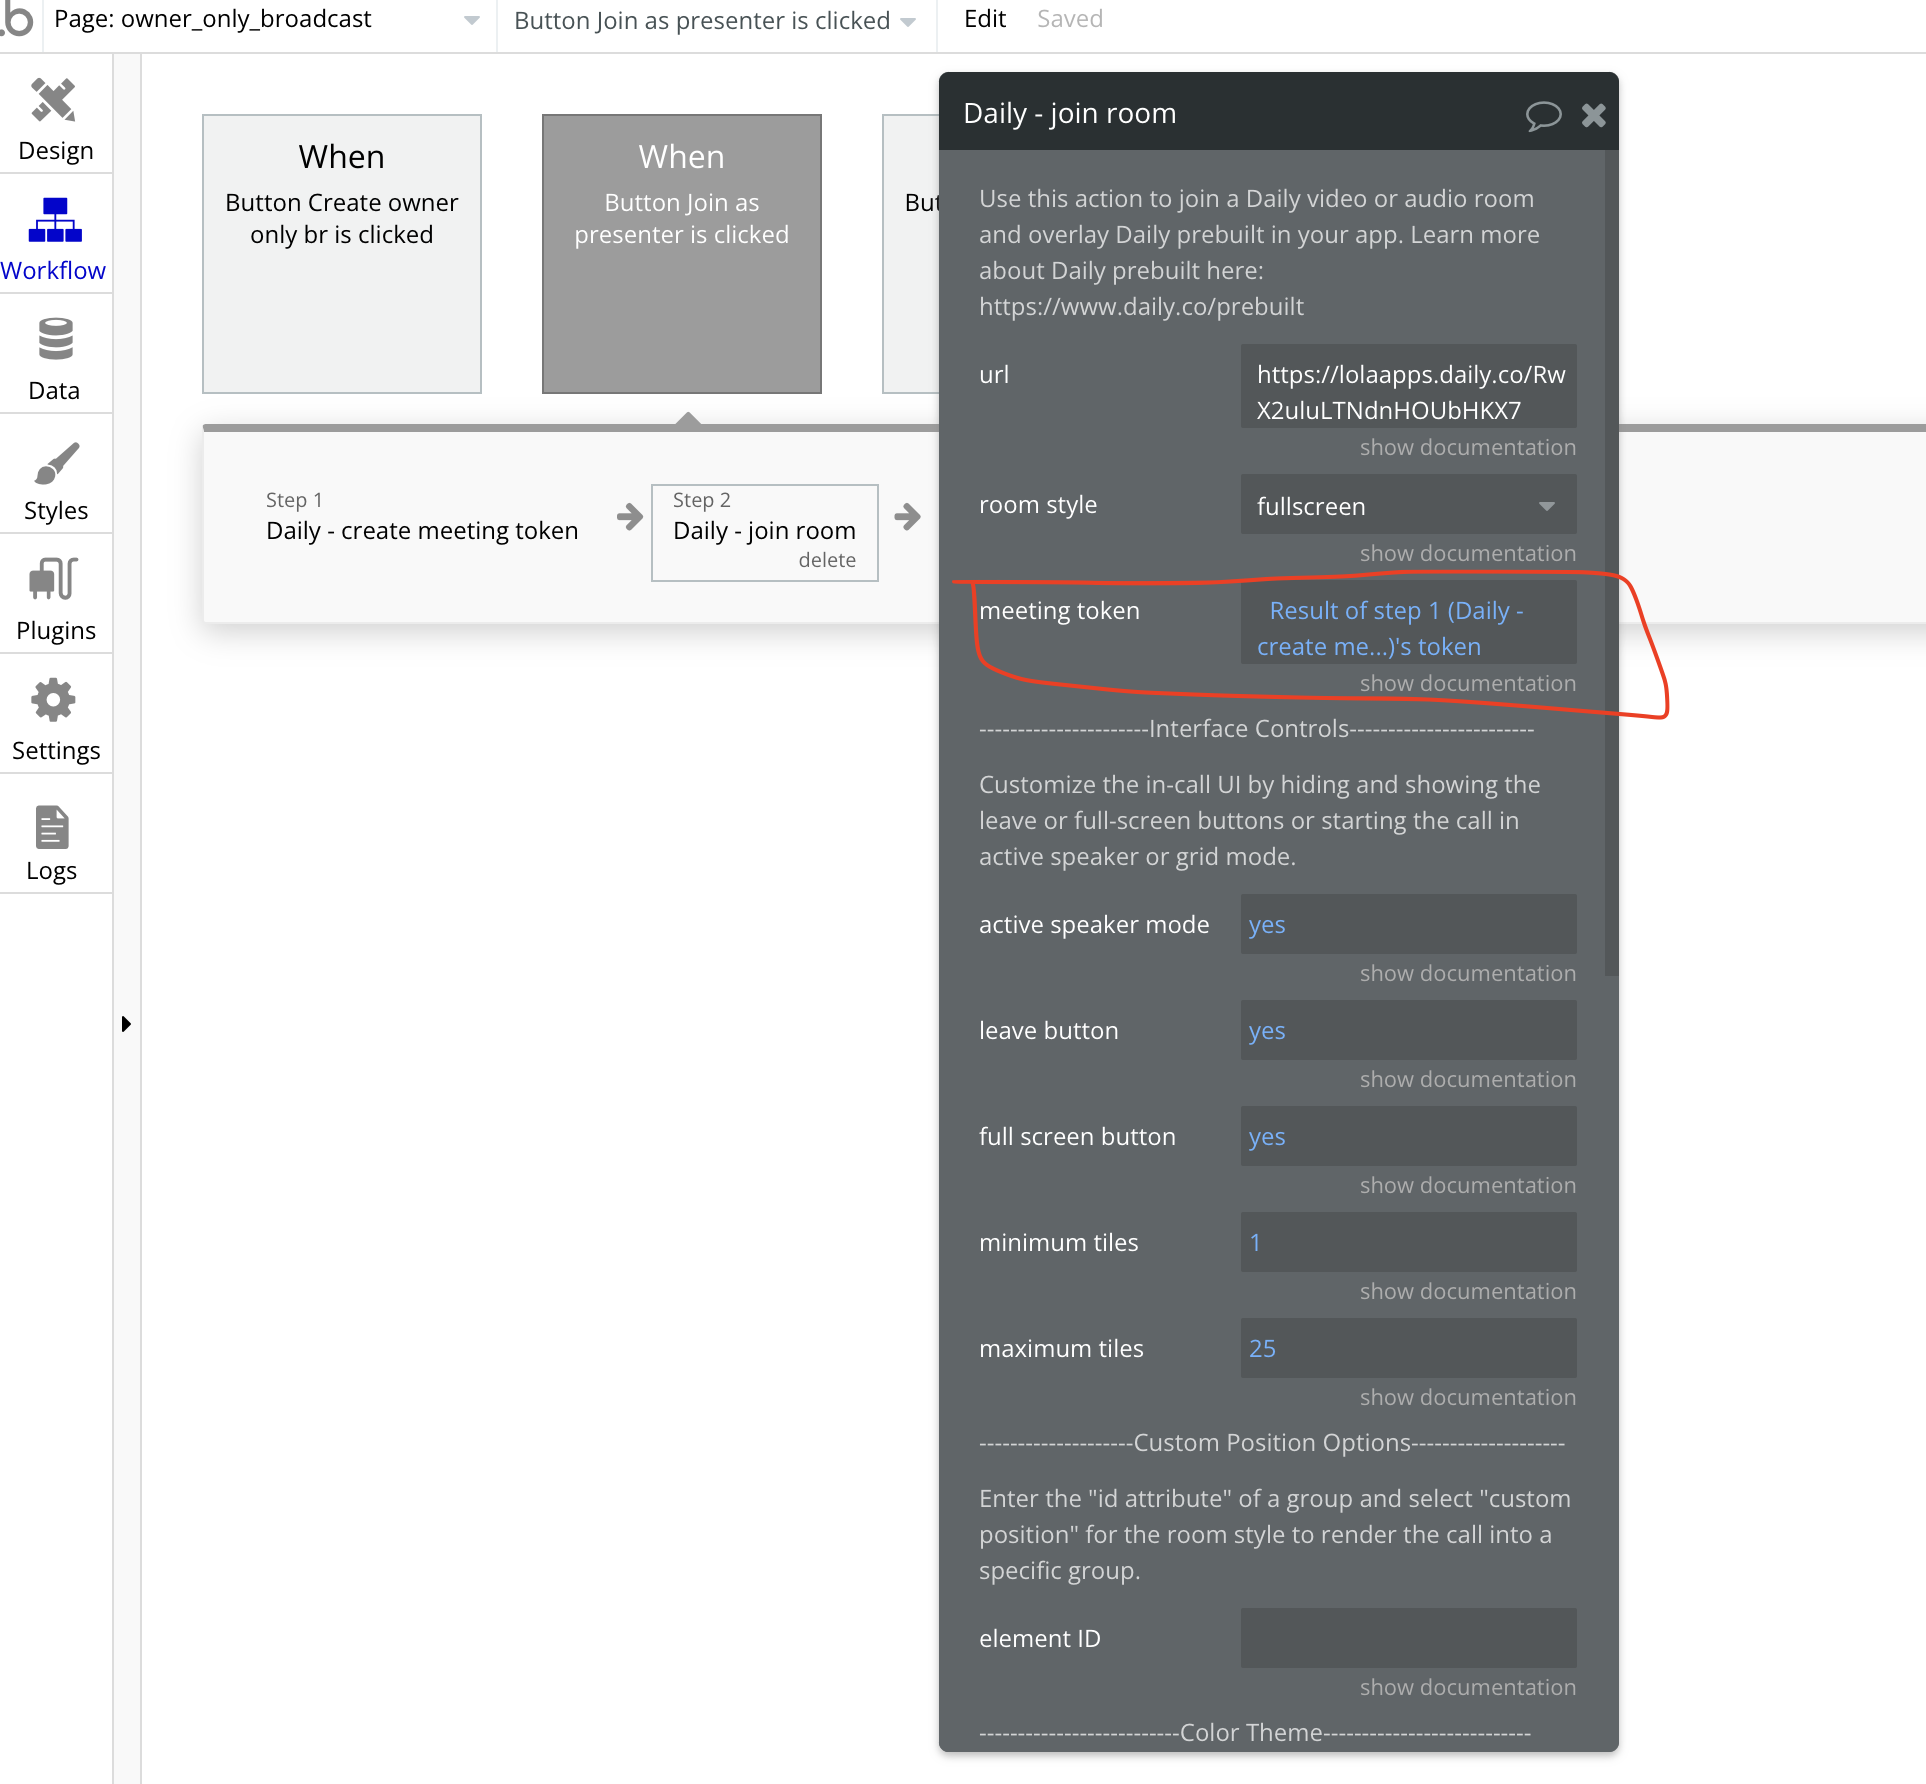 Any users with the meeting owner token will be able to join the room and share their audio and video. Other users who join the room will only be able to view the broadcast.
You can check out a demo editor or see a live demo illustrating this feature.
Any users with the meeting owner token will be able to join the room and share their audio and video. Other users who join the room will only be able to view the broadcast.
You can check out a demo editor or see a live demo illustrating this feature.