Steps
1. Add the Daily Events Element
Place the Daily events element somewhere on the page. A common approach is to place it inside a hidden popup that never triggers, keeping it out of view while it listens for events.
2. Understand Key Events
The plugin includes several key events that trigger actions when users interact with the call:- Joined - meeting: Fires when the local participant has joined the call, marking the connection.
- Left - meeting: Fires when the local participant has left the call, marking disconnection.
- Participant - joined: Fires when a new remote participant joins the call.
- Participant - left: Fires when a remote participant leaves the call.
- Recording started: Fires when a recording starts.
- Recording stopped: Fires when a recording stops.
- Recording error: Fires when a recording has an error.
- Active speaker change: Fires when the active speaker changes, useful for updating the UI during audio-only calls.
- Transcription - started: Fires for all participants when transcription starts.
- Transcription - stopped: Fires for all participants when transcription stops.
- Transcription - error: Emitted for all participants when there has been a transcription error.
3. Start Listening to Events
Make sure to add the “begin listening” action after you join a room. This is essential for Bubble to start capturing and processing the events.
4. Trigger Actions Based on Events
Use the events to trigger specific actions in your app.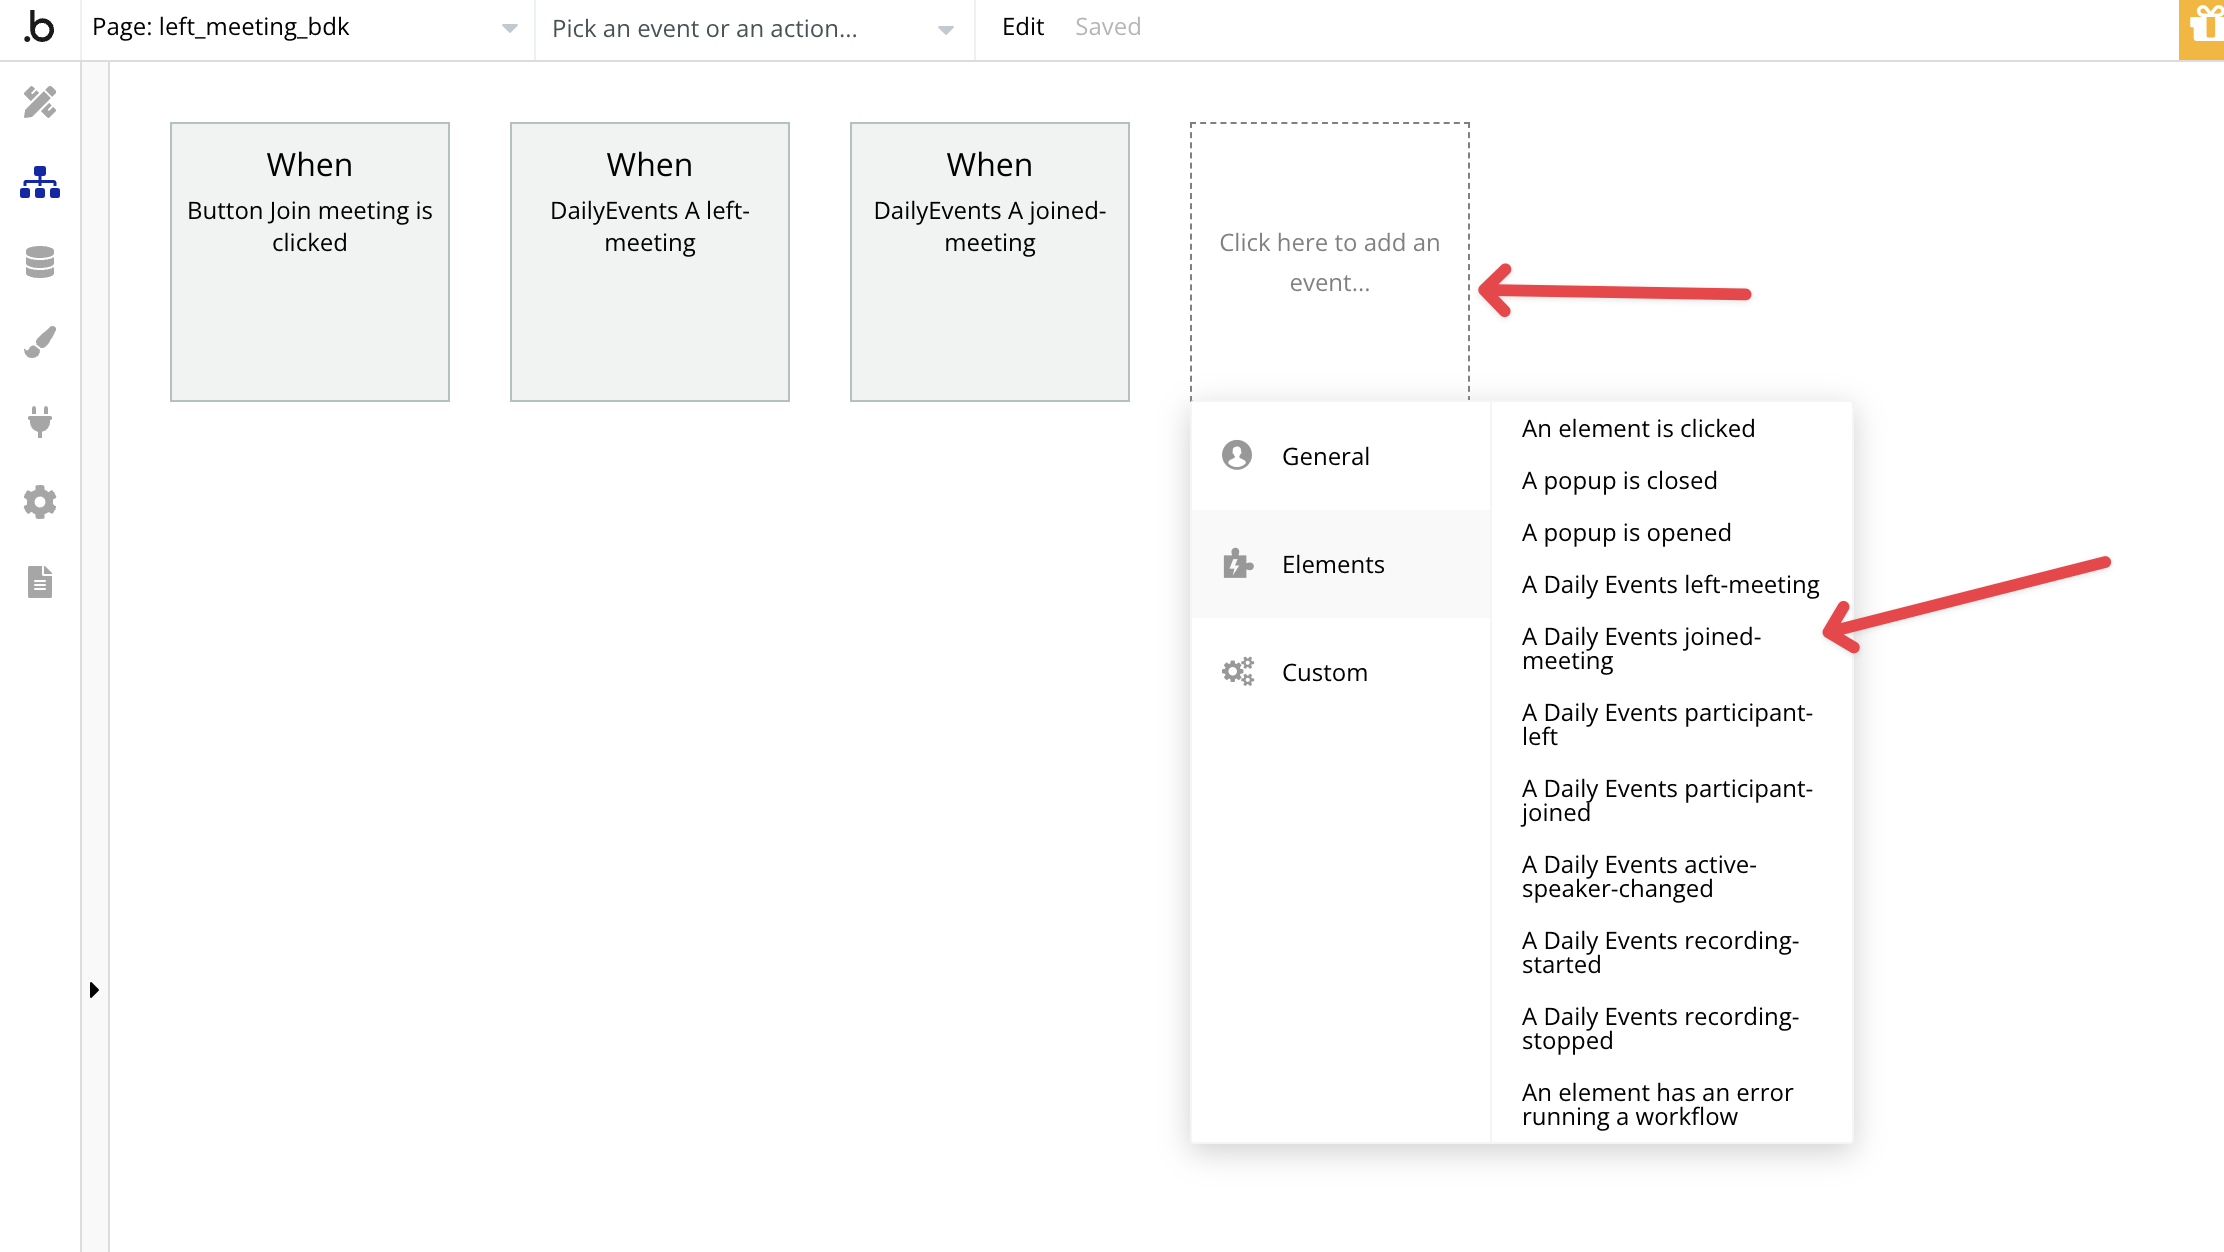 For example, you could:
- Redirect users to a different page once they leave the call.
- Execute actions only after the user has joined the call.